This section allows you to manage and customize the Footer Section of your website.You can control the visibility, content, and layout using the available theme options.
Important :
- Make sure you are logged in to your WordPress Dashboard before following the steps below.
- Go to Appearance > Customize
- Open Footer > Footer Above
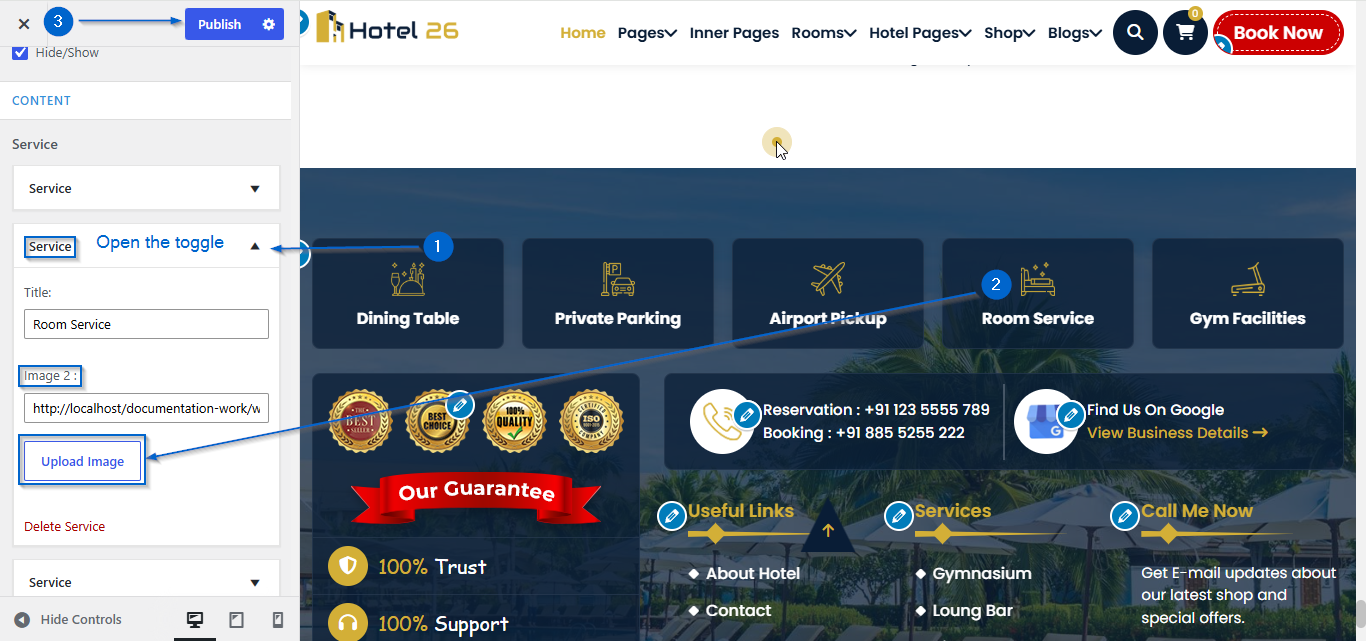
- Click to expand the Service toggle
- Click Upload Image under the Image option.
- Select an image of your choice
- Click Publish
- Go to Appearance > Customize
- Open Footer > Footer Above
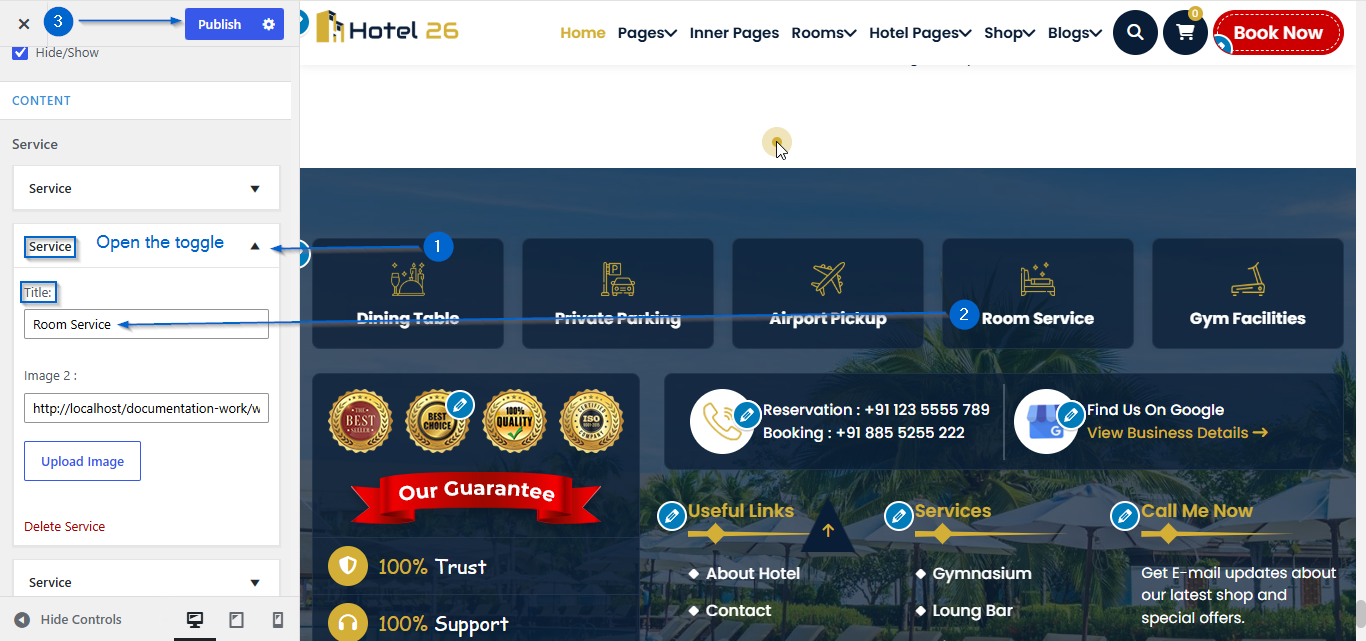
- Click to expand the Service toggle
- Use the Title option to edit the content
- Click Publish
- Go to Appearance > Customize
- Open Footer > Footer Above
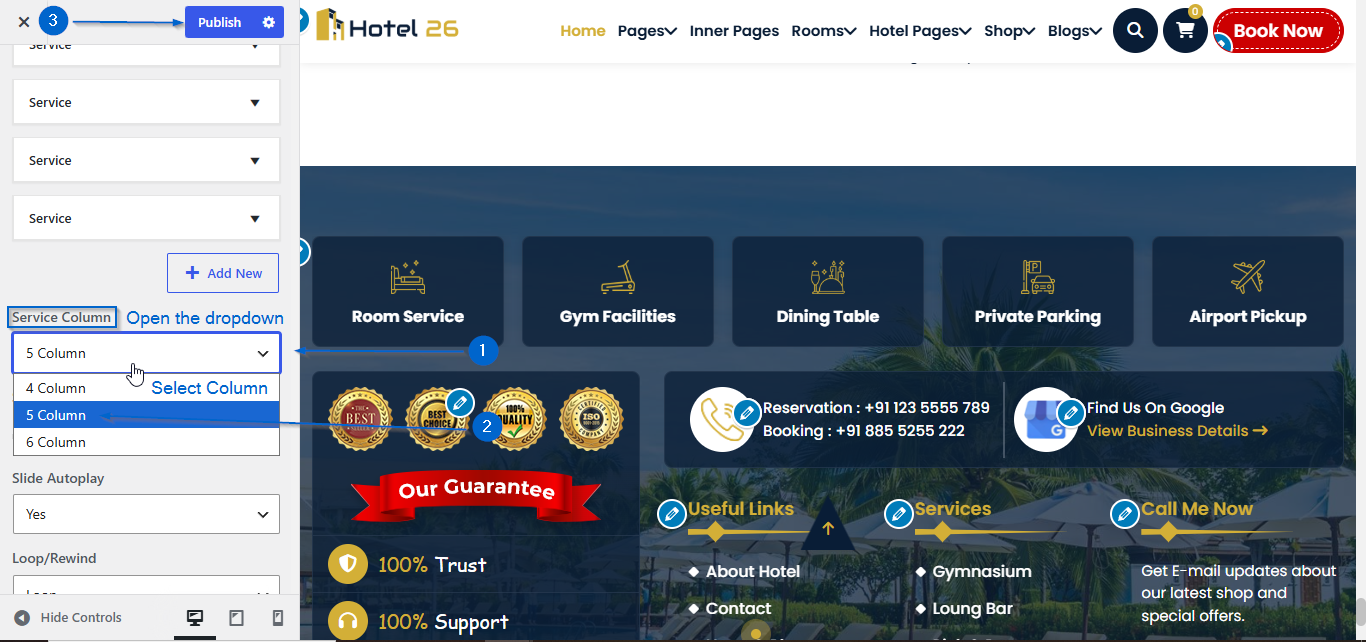
- Under the Service Column option, open the dropdown to choose the number of columns you want to display
- Click Publish
- Go to Appearance > Customize
- Open Footer > Footer Above
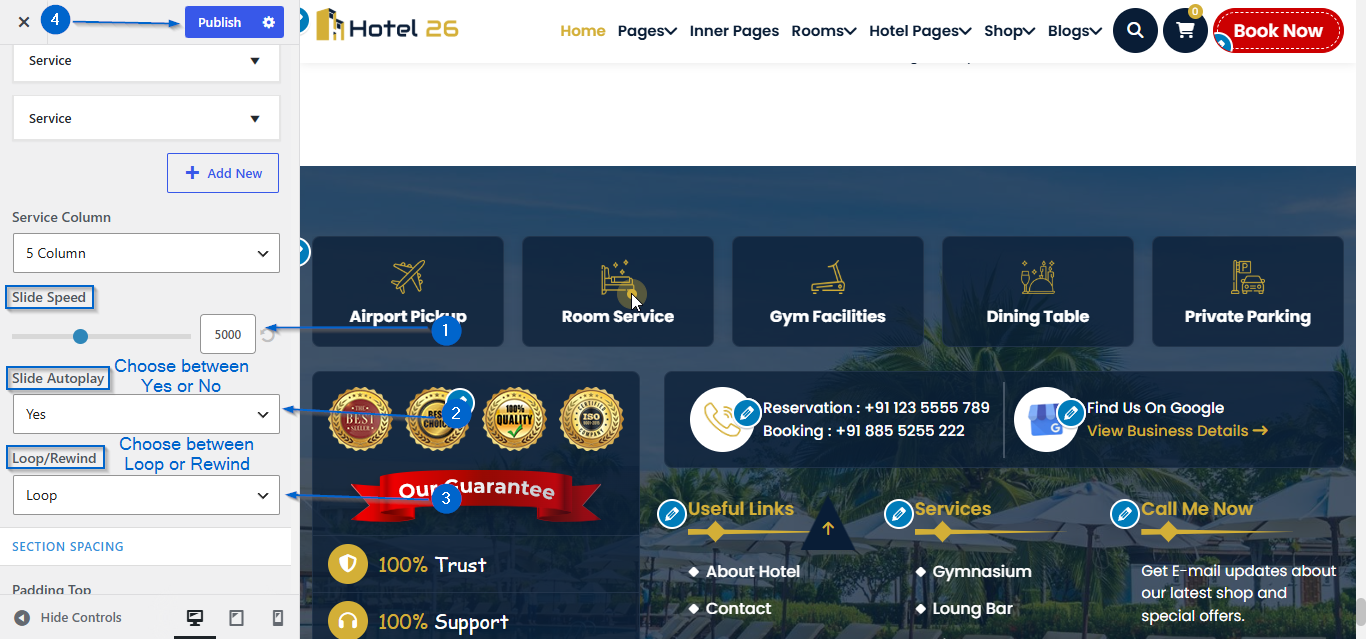
- Scroll down until you see the Slide Speed option.
- Below this option, you’ll find additional slider settings.
- Use the Slide Speed slider to adjust the transition speed.
- Open the Slide Autoplay dropdown to choose between Yes or No.
- From the Loop/Rewind dropdown option, you can choose between Loop or Rewind.
- Click Publish
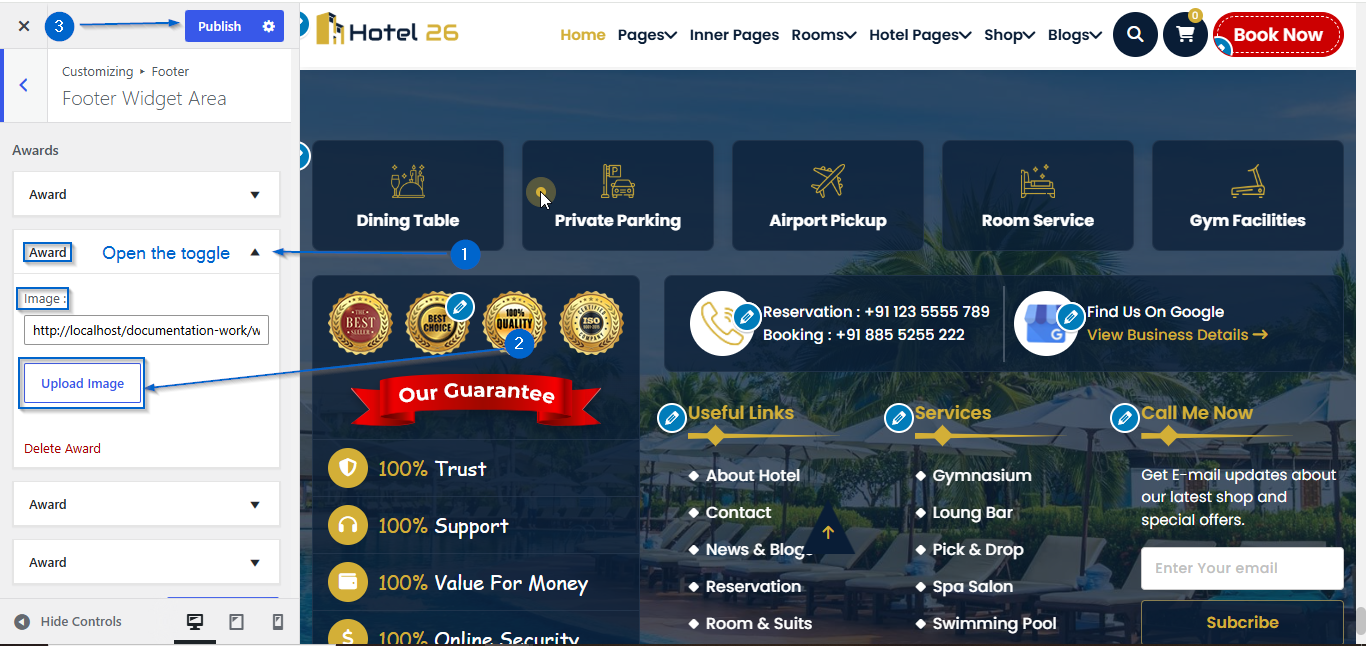
- Go to Appearance > Customize
- Open Footer > Footer Widget Area
- Click to expand the Award toggle
- Click Upload Image under the Image option.
- Select an image of your choice
- Click Publish
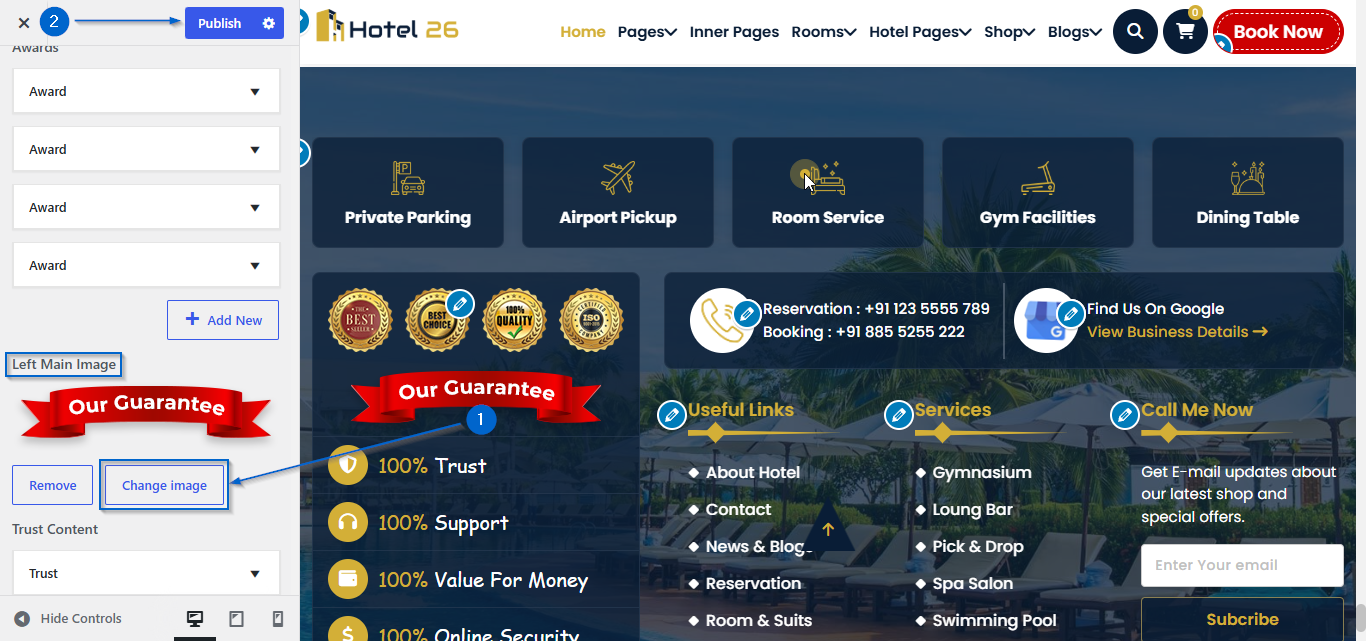
- Go to Appearance > Customize
- Open Footer > Footer Widget Area
- Click Upload Image under the Left Main Image option.
- Select an image of your choice
- Click Publish
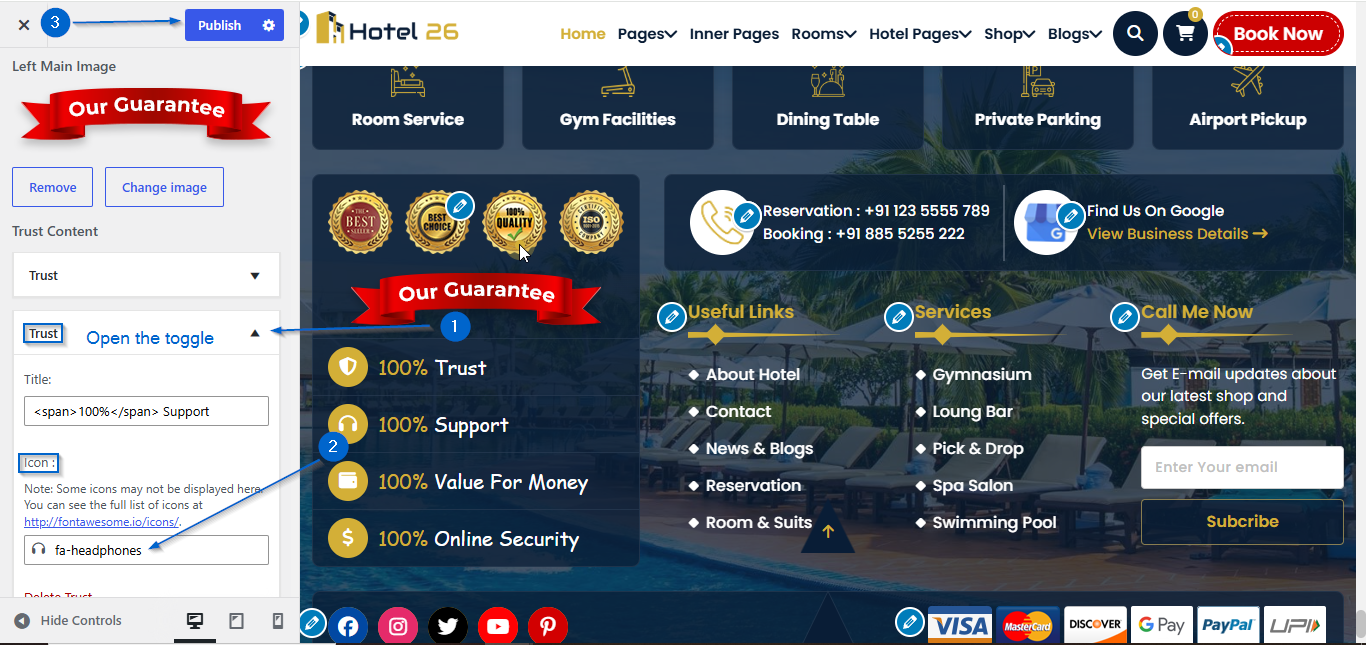
- Go to Appearance > Customize
- Open Footer > Footer Widget Area
- Click to expand the Trust toggle
- Use the Icon: option to choose an icon
- Click Publish
- Go to Appearance > Customize
- Open Footer > Footer Widget Area
- Click to expand the Trust toggle
- Use the Title option to edit the content inside the <span></span> tag
- Click Publish
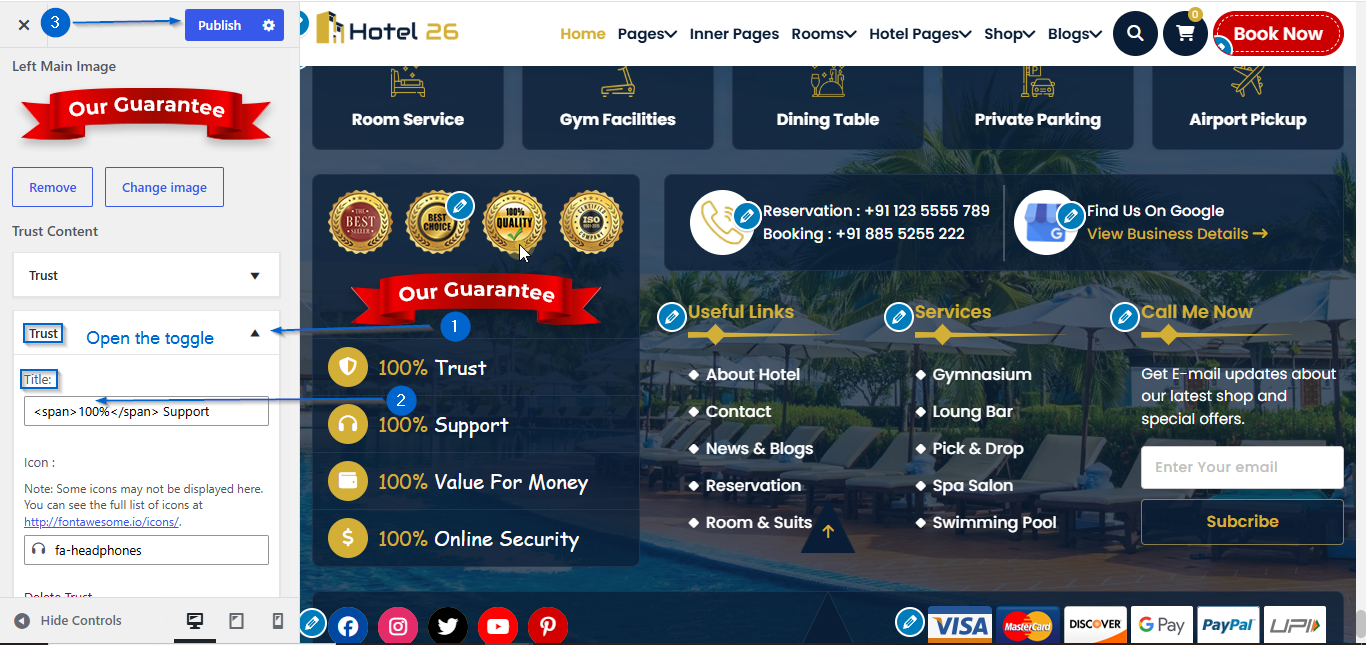
- Go to Appearance > Customize
- Open Footer > Footer Widget Area
- Click to expand the Trust toggle
- Use the Title option to edit the content
- Click Publish
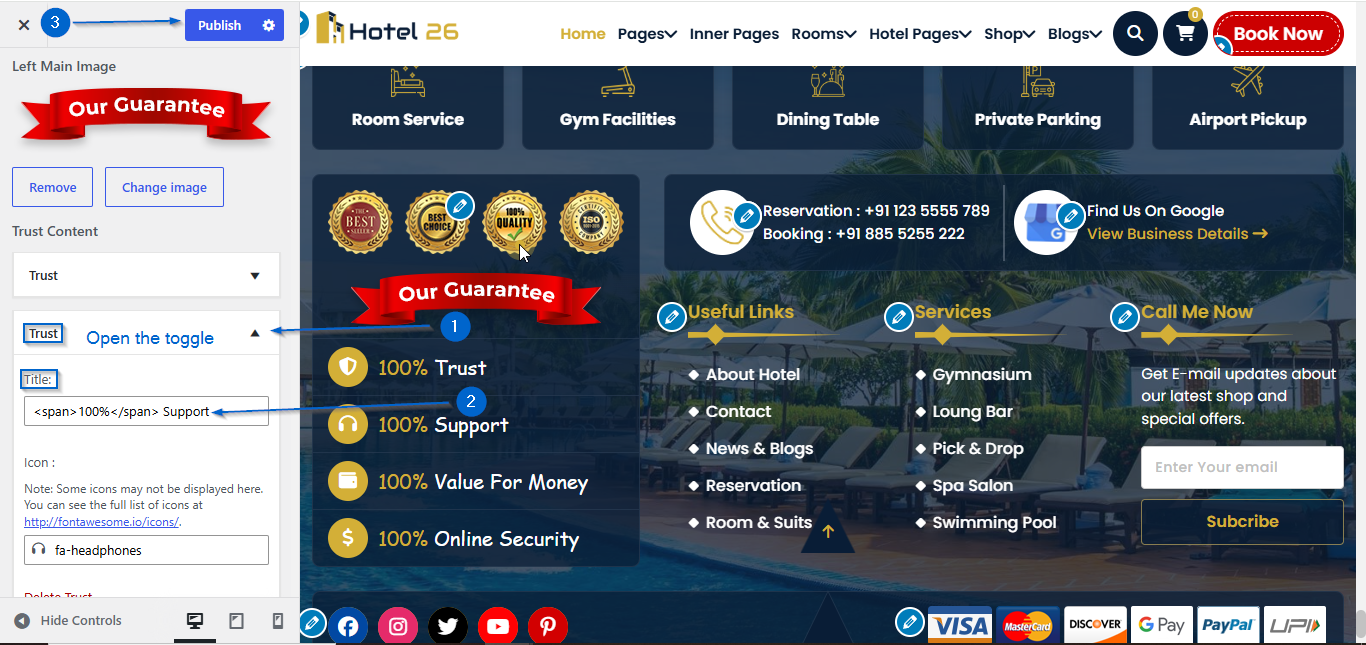
(a) Call Image
- Go to Appearance > Customize
- Open Footer > Footer Widget Area
- Click Change Image under the Call Image option.
- Select an image of your choice
- Click Publish
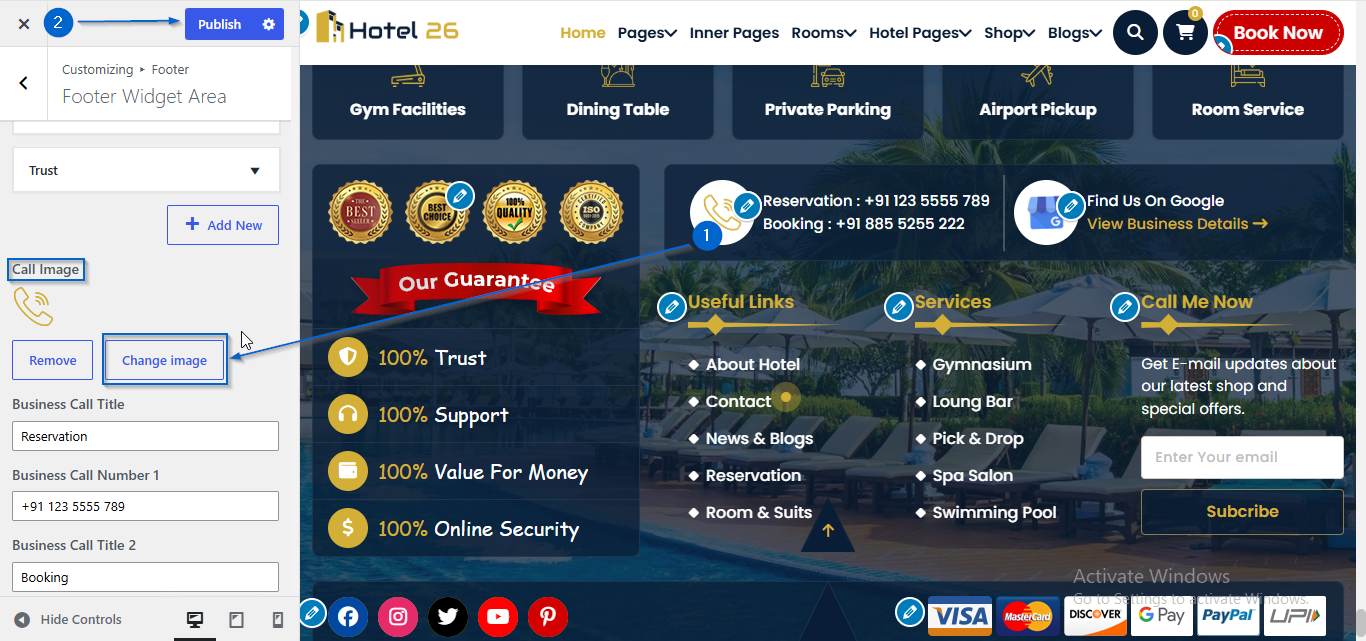
(b) Store Image
- Go to Appearance > Customize
- Open Footer > Footer Widget Area
- Click Change Image under the Store Image option.
- Select an image of your choice
- Click Publish
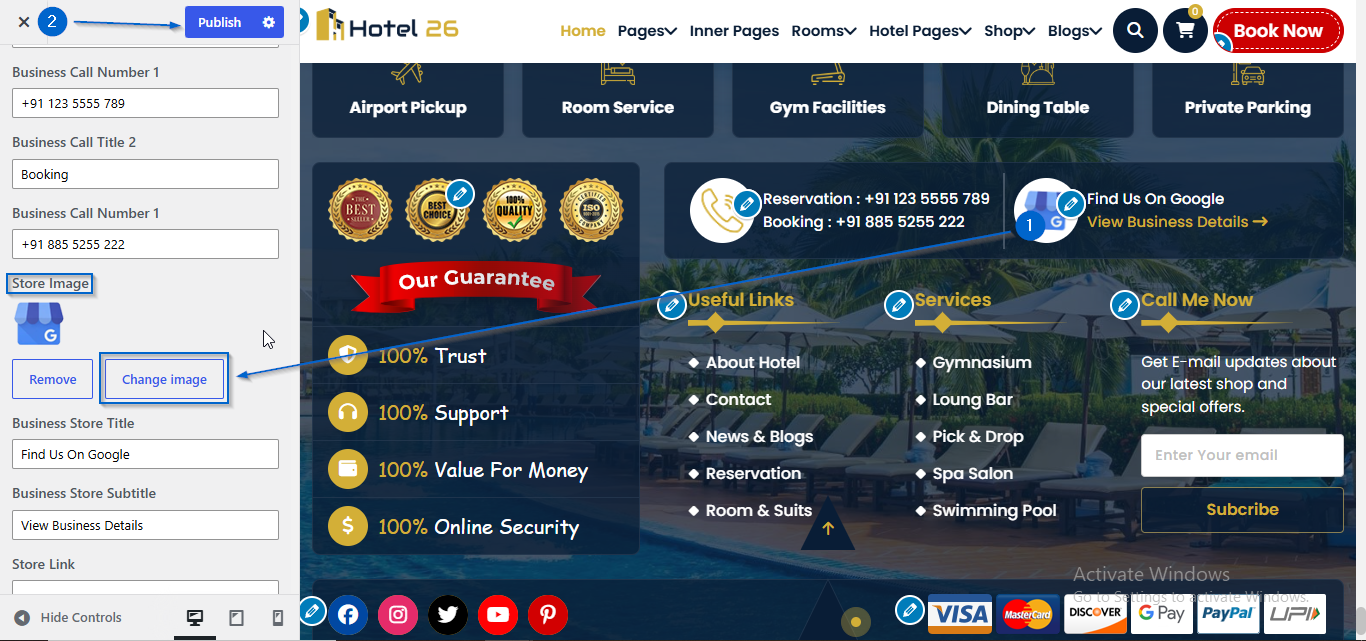
(a) Call Text
- Go to Appearance > Customize
- Open Footer > Footer Widget Area
- Use the Business Call Title , Business Call Number 1 , Business Call Title 2 and Business Call Number 1 options to edit the content
- Click Publish
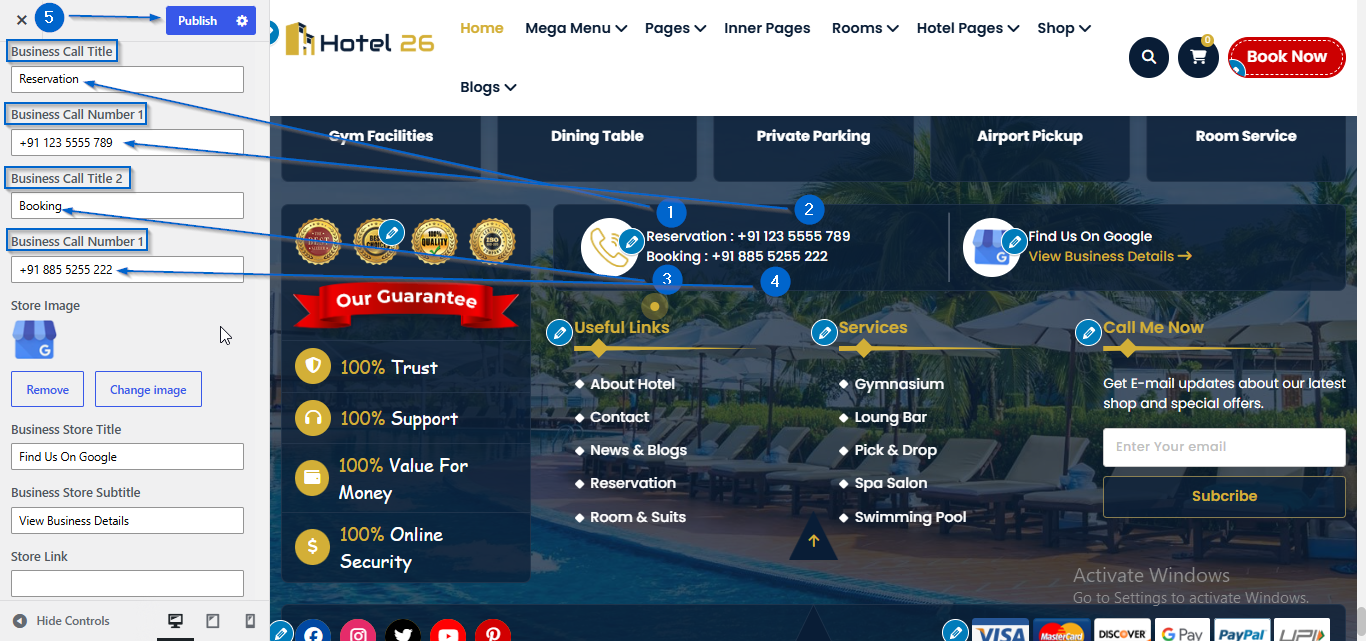
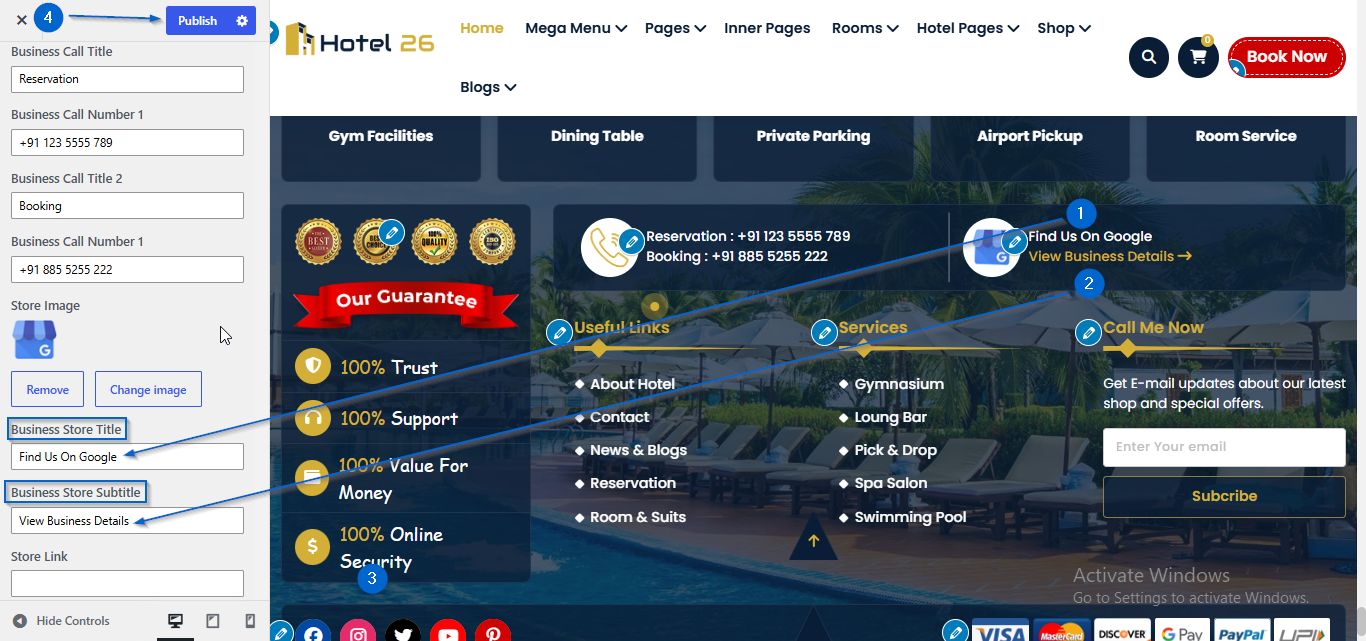
(b) Business Text
- Go to Appearance > Customize
- Open Footer > Footer Widget Area
- Use the Business Store Title and Business Store Subtitle options to edit the content
- Click Publish
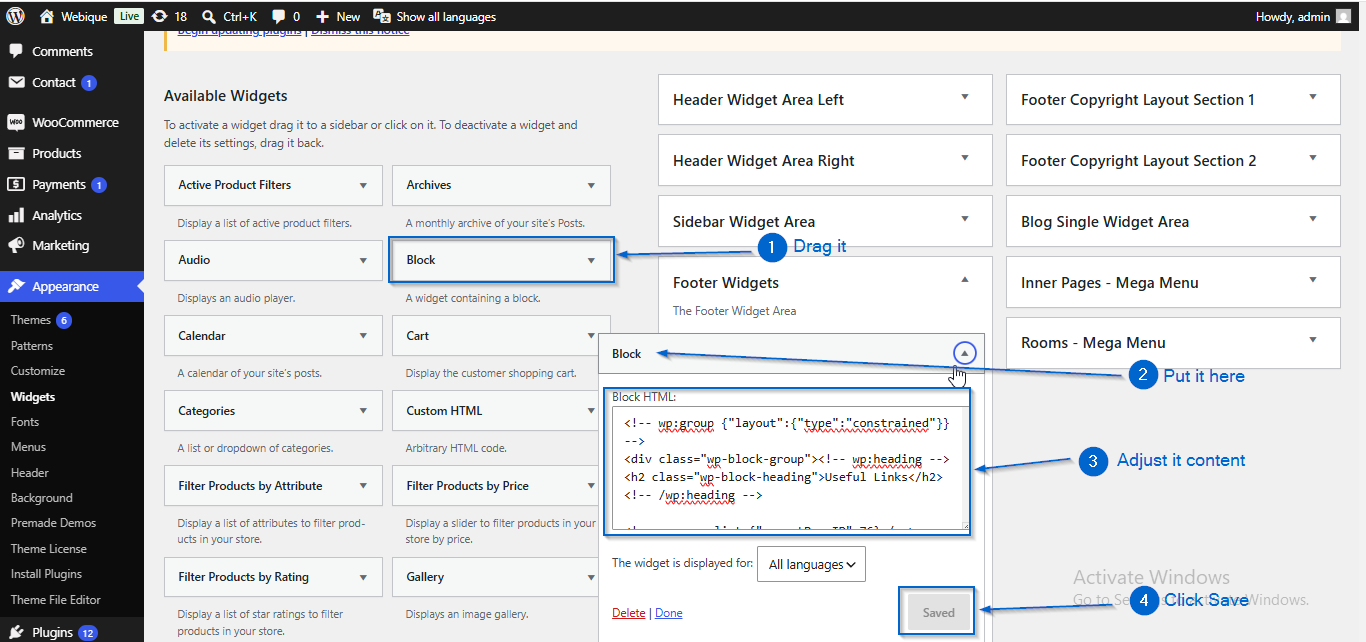
Before you begin, choose the method you want to use. You can add footer widgets from the WordPress Dashboard or the Customizer.
(a) Dashboard Method
- Go to Appearance > Widgets
- Select a widget from Available Widgets.
- Add it to the Footer Widgets
- Configure the widget content
- Click Save
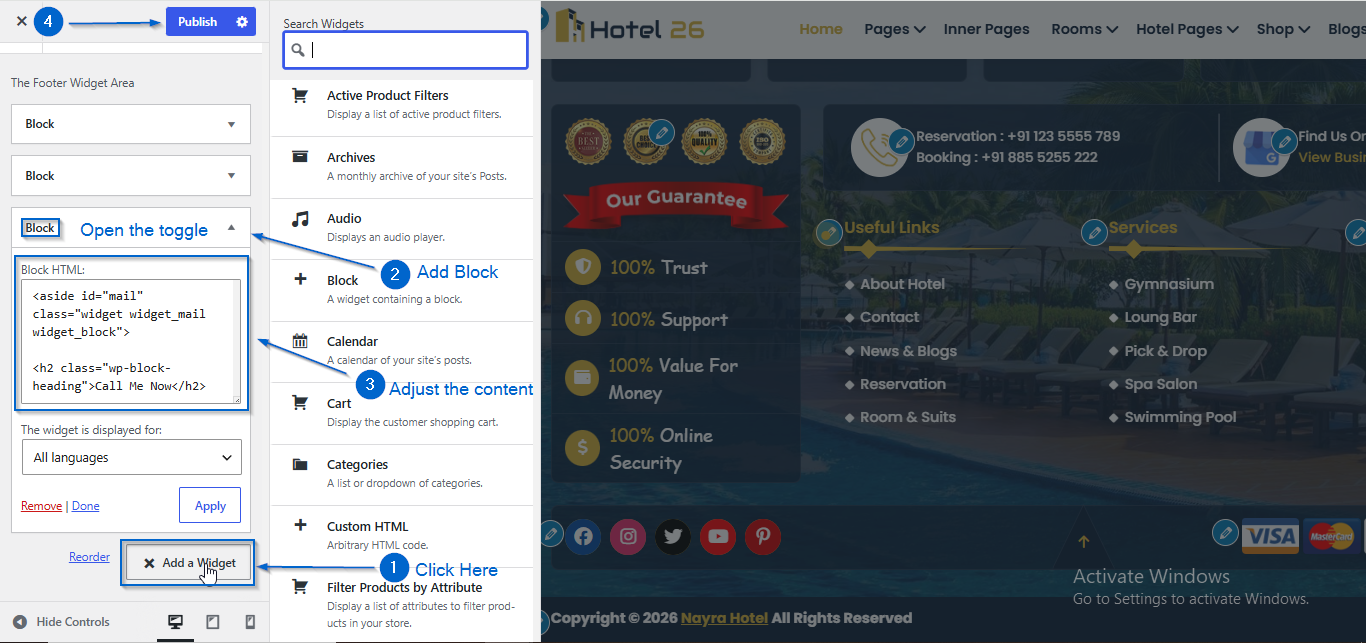
(b) Customizer Method
- Go to Appearance > Customize
- Open Footer > Footer Widgets
- Click Add a Widget
- Select the widget you want to add
- Configure the widget content
- Click Publish
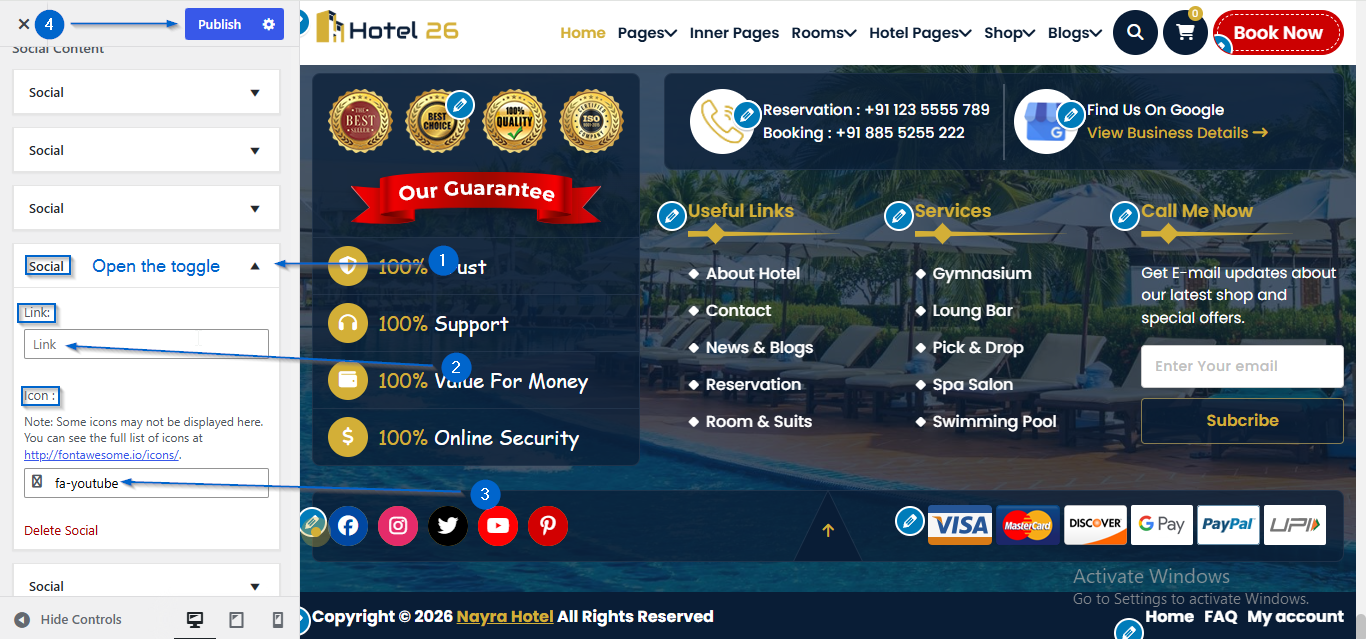
- Go to Appearance > Customize
- Open Footer > Below Footer
- Click to expand the Social toggle
- Enter the link in the Link: option
- Use the Icon: option to choose an icon
- Click Publish
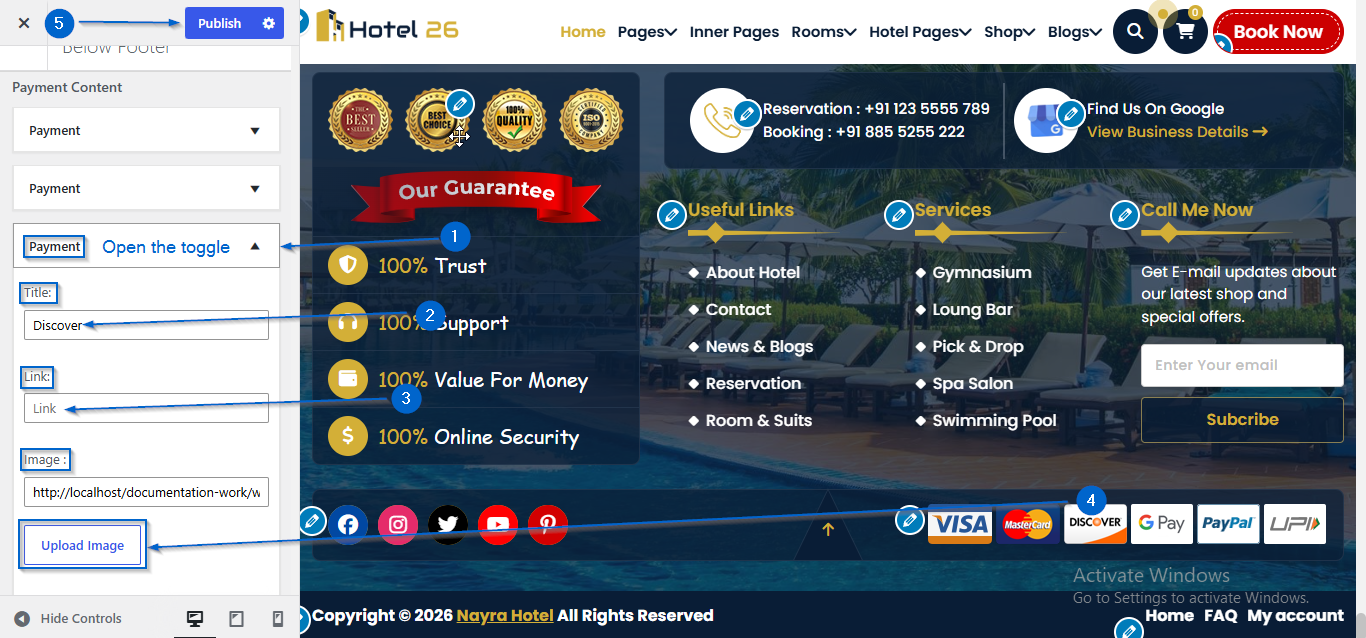
- Go to Appearance > Customize
- Open Footer > Below Footer
- Click to expand the Payment toggle
- Click Upload Image under the Image: option.
- Select an image of your choice
- Enter the link in the Link: option
- Click Publish
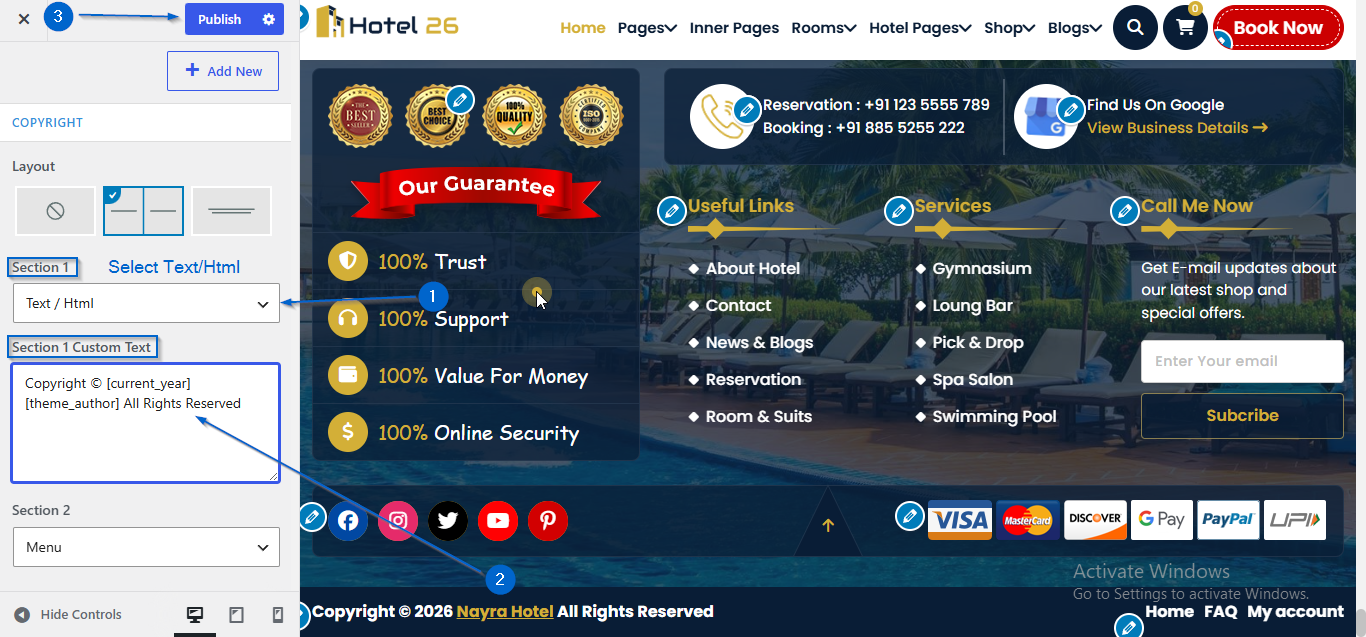
- Go to Appearance > Customize
- Open Footer > Below Footer
- Select the Text/Html from the Section 1 dropdown
- Use the Section 1 Custom Text option to add the content
- Click Publish
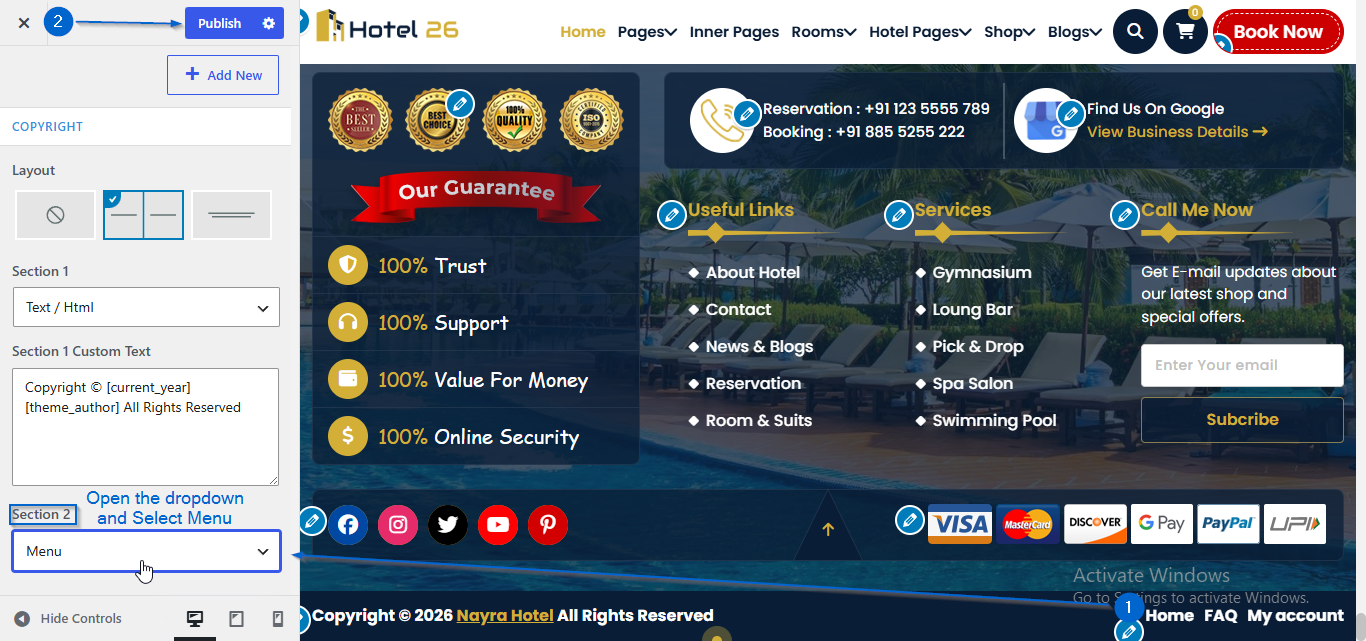
- Go to Appearance > Customize
- Open Footer > Below Footer
- Select the Menu from the Section 2 dropdown
- Click Publish
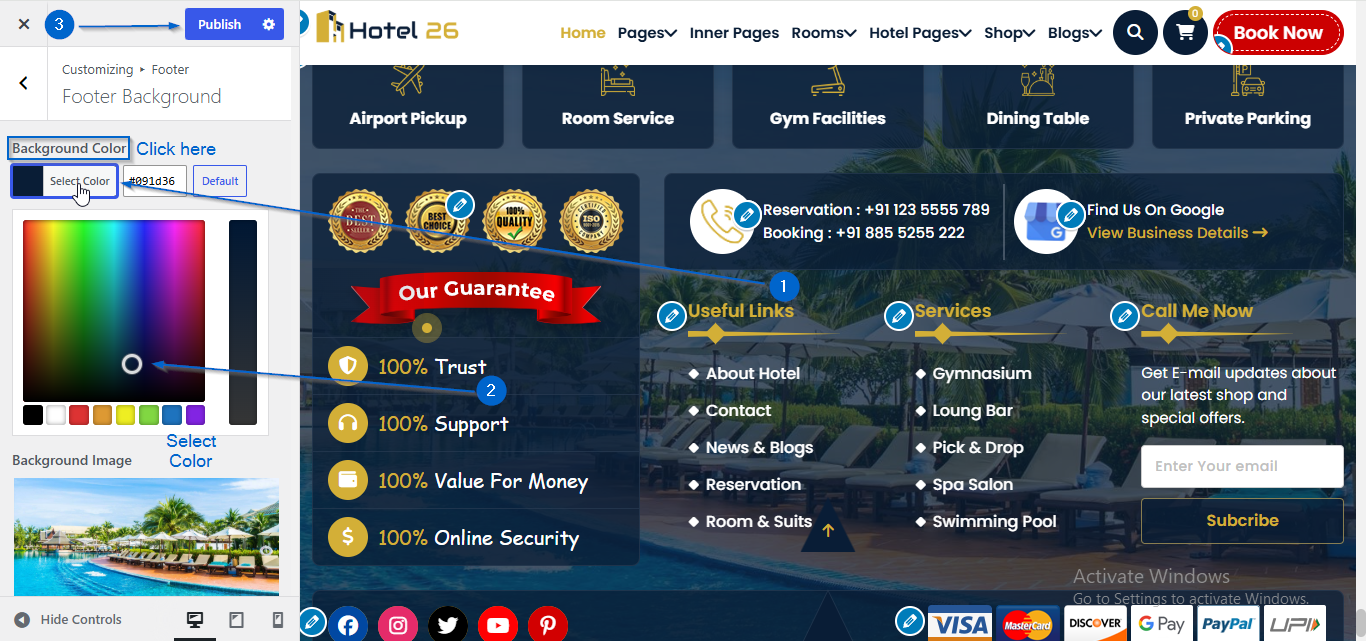
- Go to Appearance > Customize
- Open Footer > Footer Background
- Use the Background Color option to select the color
- Click Publish
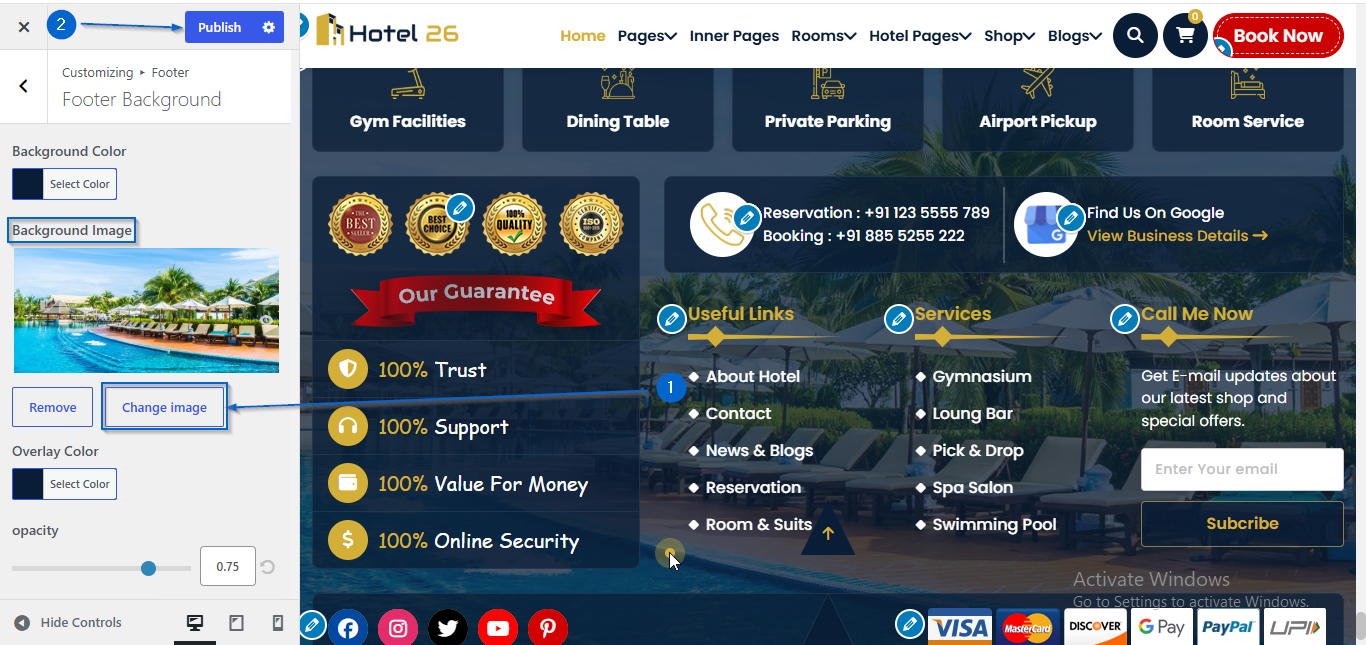
- Go to Appearance > Customize
- Open Footer > Footer Background
- Click Change Image under the Background Image option
- Select an image of your choice
- Click Publish
- Go to Appearance > Customize
- Open Footer > Footer Background
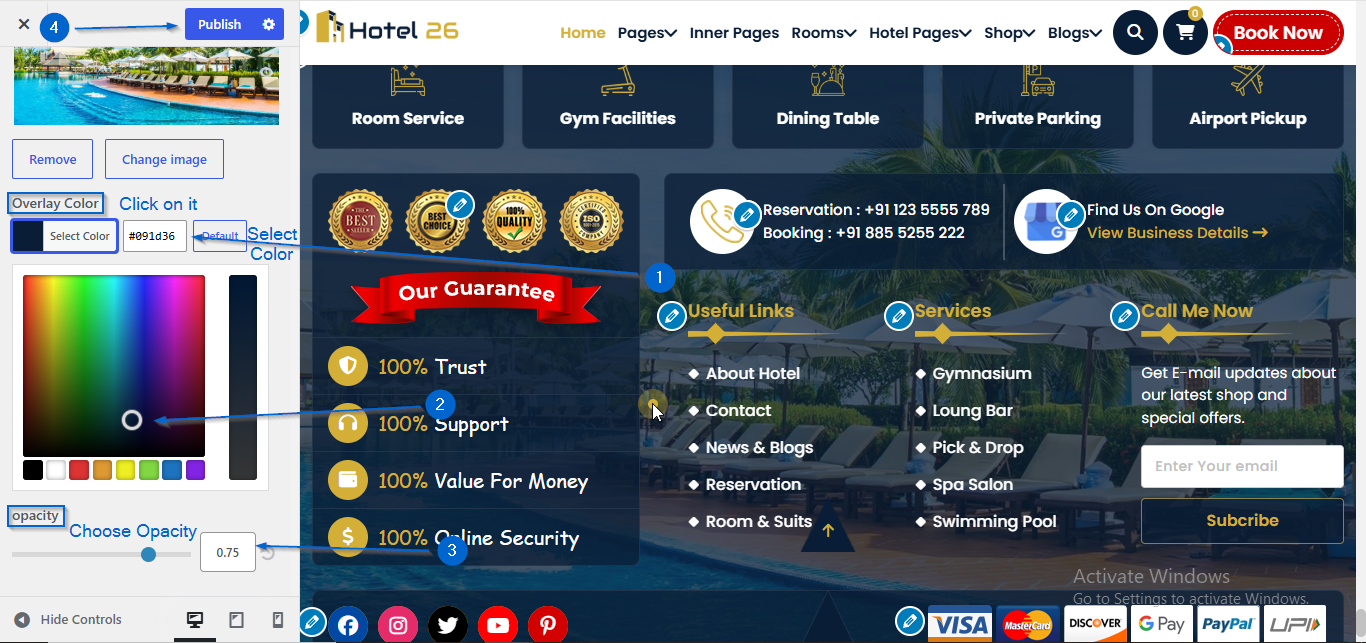
- Choose a color using the Overlay Color option
- Adjust the opacity using the Opacity option
- Click Publish