In this article, you’ll learn how to set up and customize the Slider Section of the Webique Pro theme, This guide will help you configure these settings to align with your site’s branding and functionality needs.
- Go to Appearance > Customize
- Open Page Templates > Contact Form Section
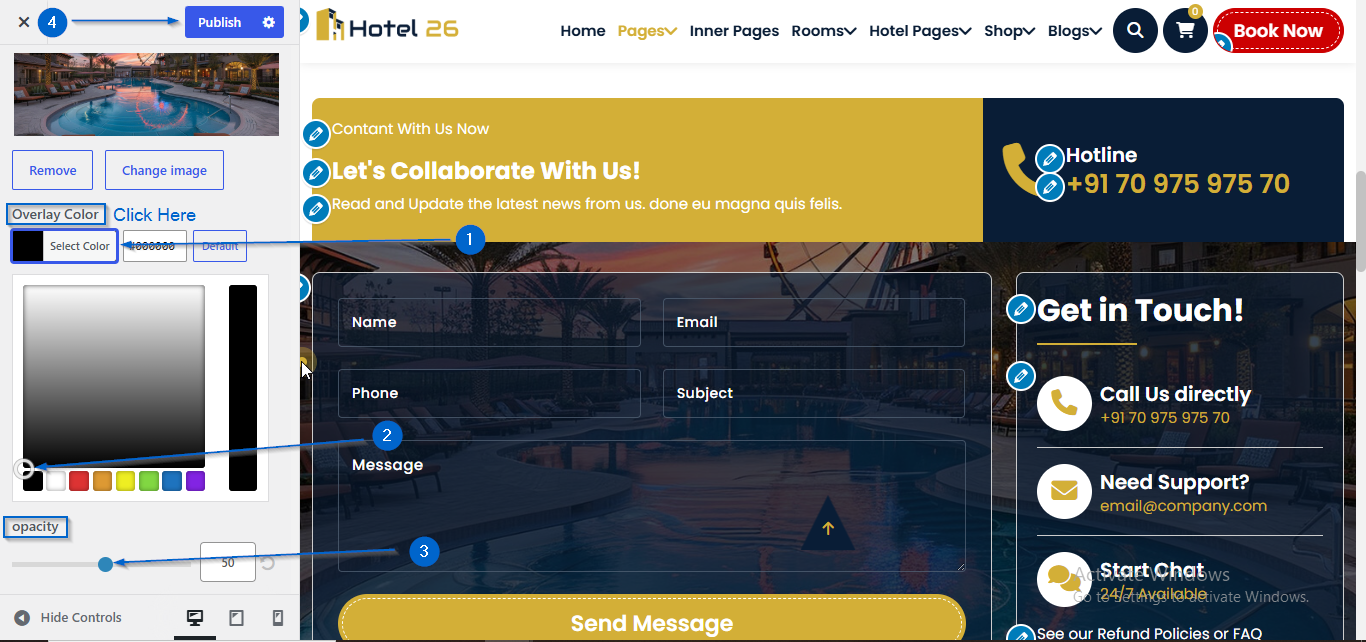
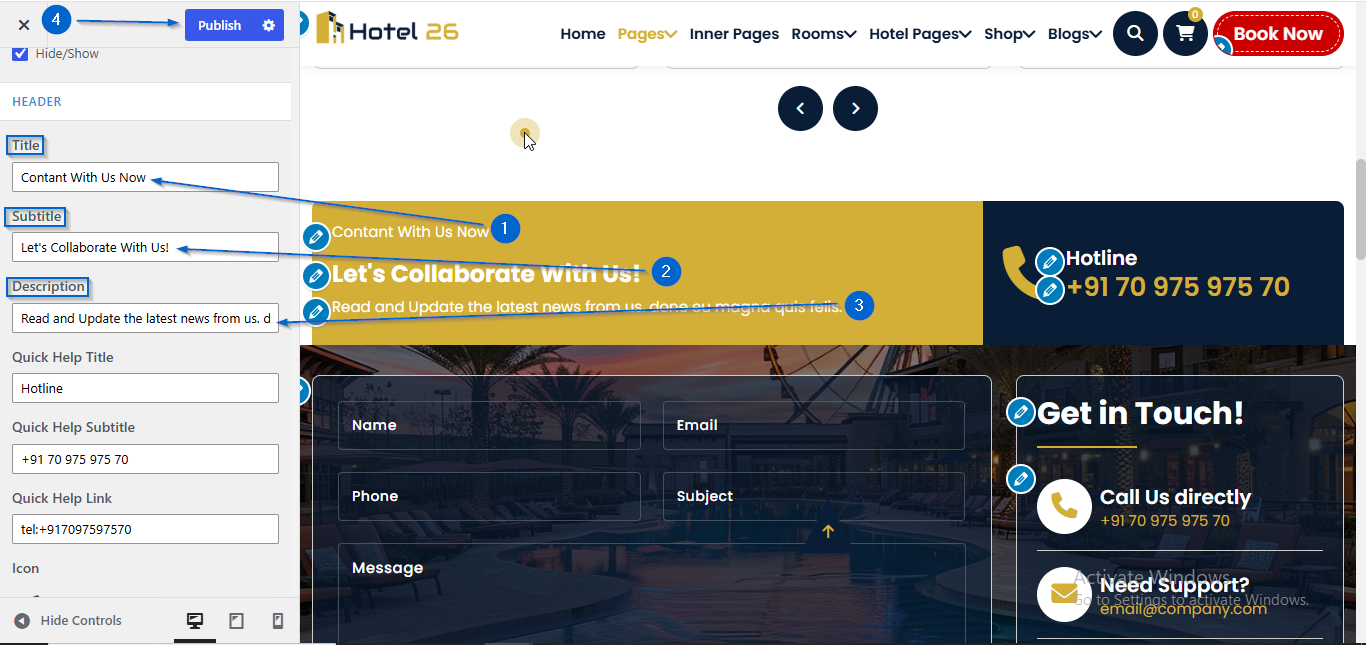
- Use the Title, Subtitle, and Description options to add the section heading details.
- Click Publish
- Go to Appearance > Customize
- Open Page Templates > Contact Form Section
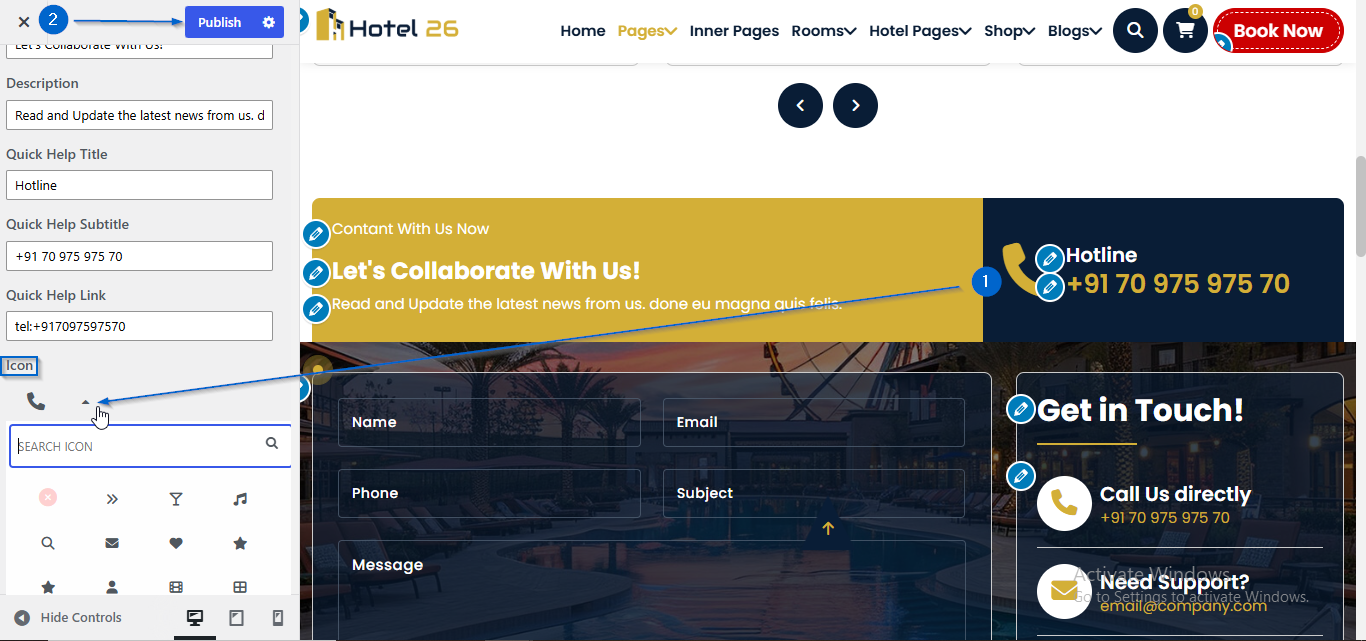
- Use the Icon option to choose an icon
- Click Publish
- Go to Appearance > Customize
- Open Page Templates > Contact Form Section
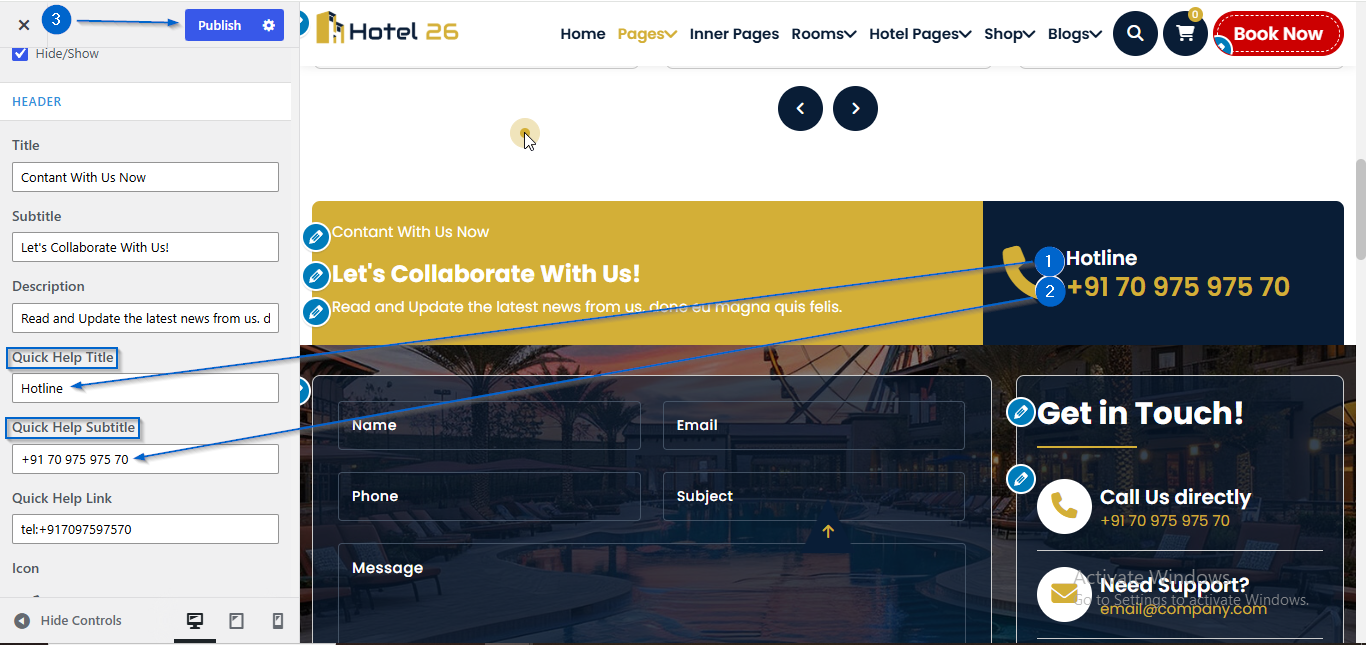
- Use the Quick Help Title and Quick Help Subtitle to edit the content
- Click Publish
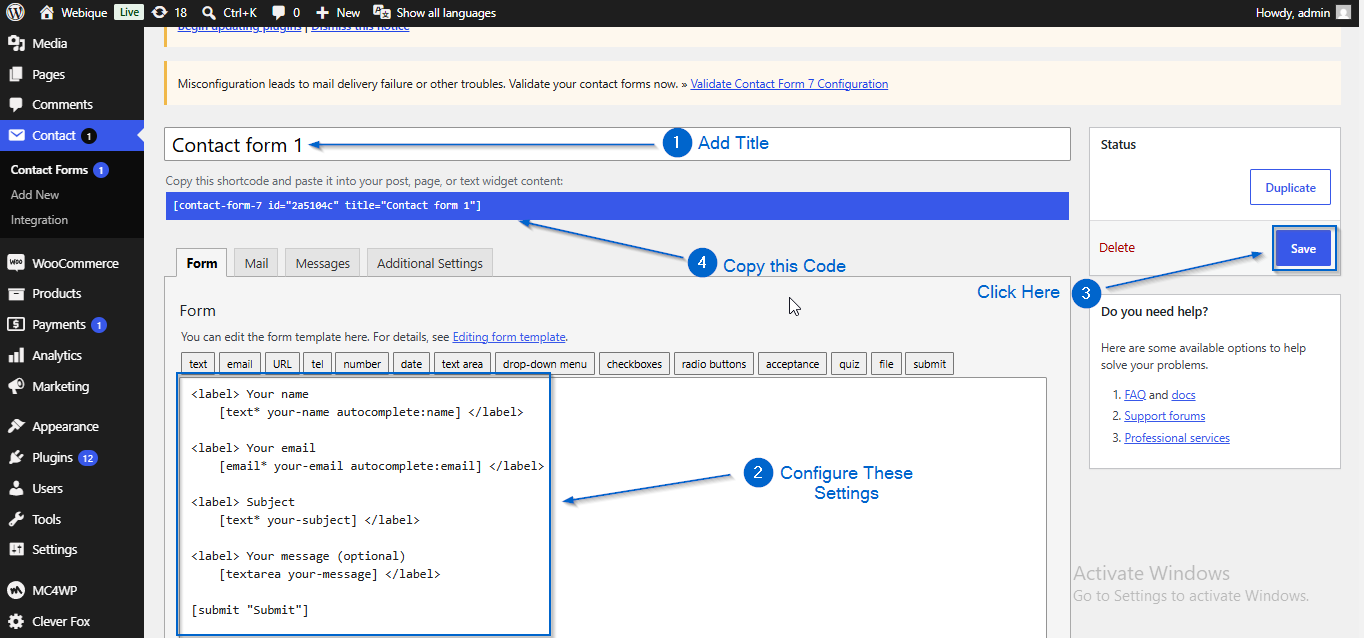
(a) Create the Form
- Go to Contact > Add New
- Enter the Form title
- Configure the form fields
- Click Save
- Copy the generated shortcode
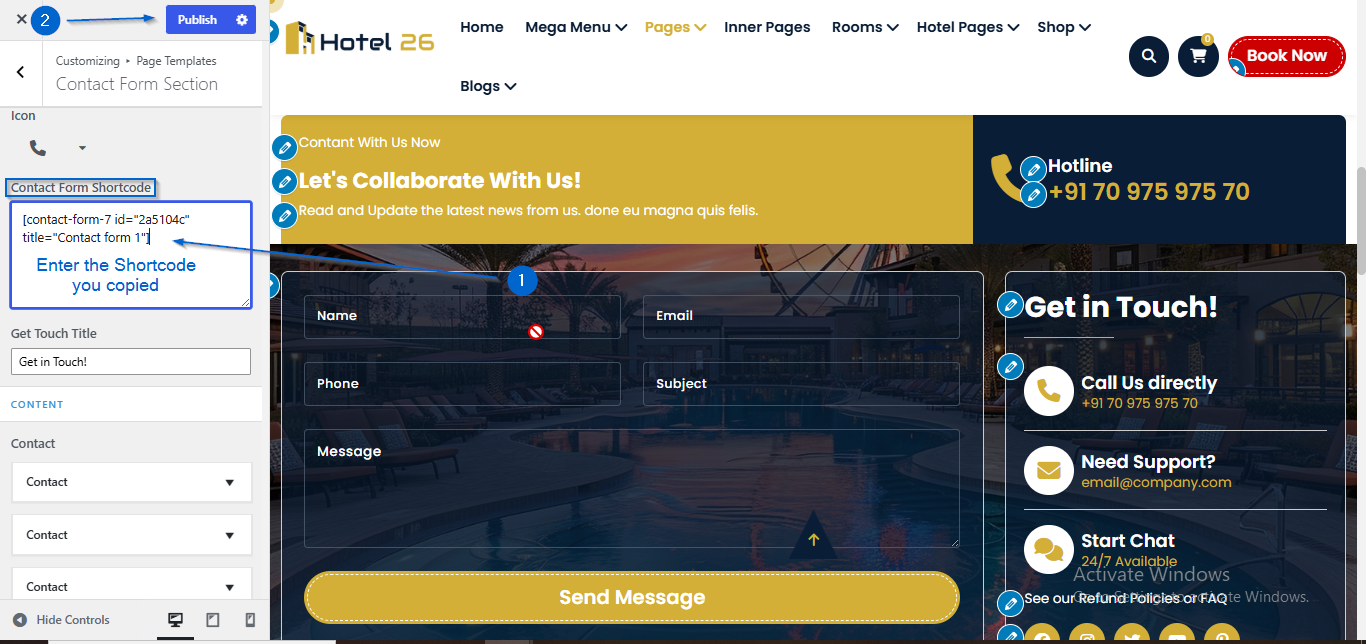
(b) Adding the Form
- Go to Appearance > Customize
- Open Page Templates > Contact Form Section
- Enter the heading in the Form Title option
- Paste the shortcode into the Shortcode option
- Click Publish
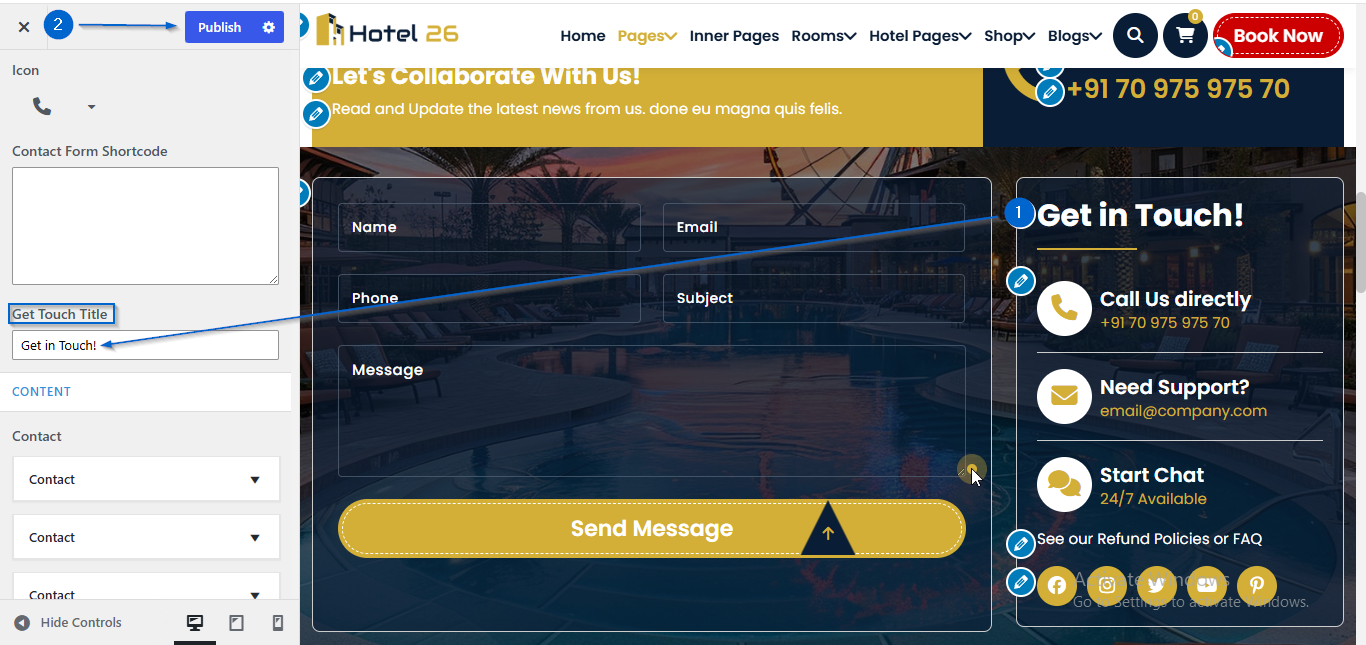
- Go to Appearance > Customize
- Open Page Templates > Contact Form Section
- Use the Get Touch Title option to edit the content
- Click Publish
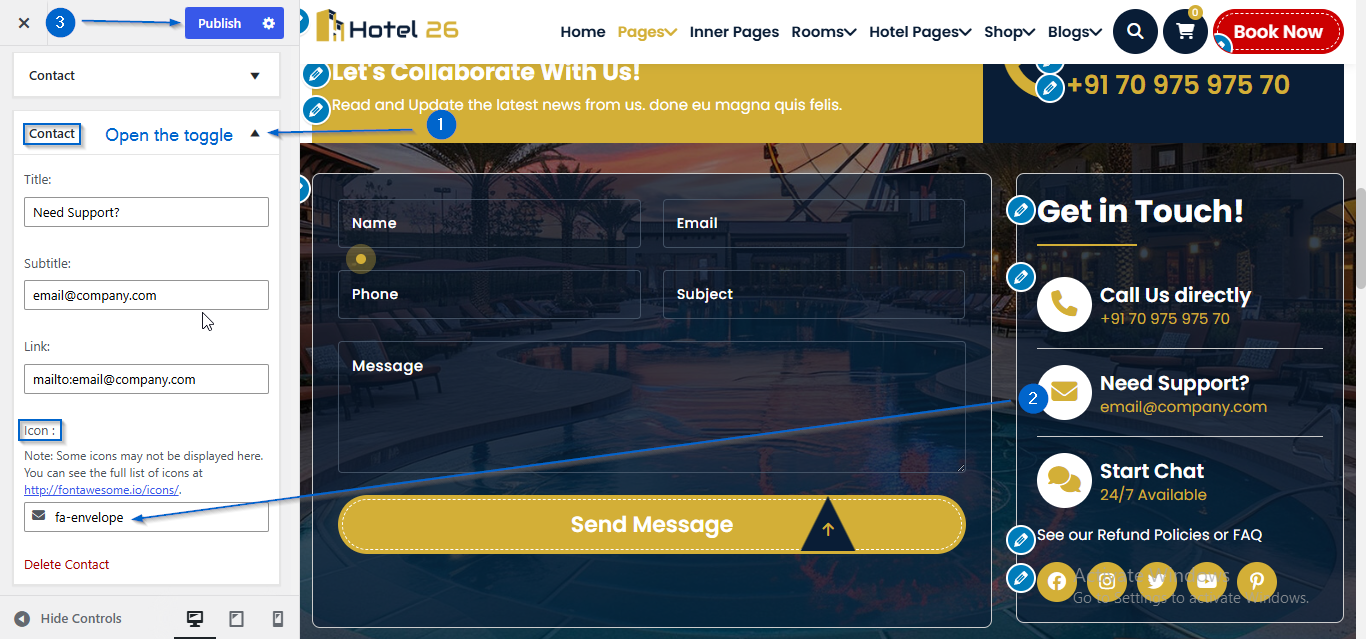
- Go to Appearance > Customize
- Open Page Templates > Contact Form Section
- Click to expand the Contact toggle
- Use the Icon : option to choose an icon
- Click Publish
- Go to Appearance > Customize
- Open Page Templates > Contact Form Section
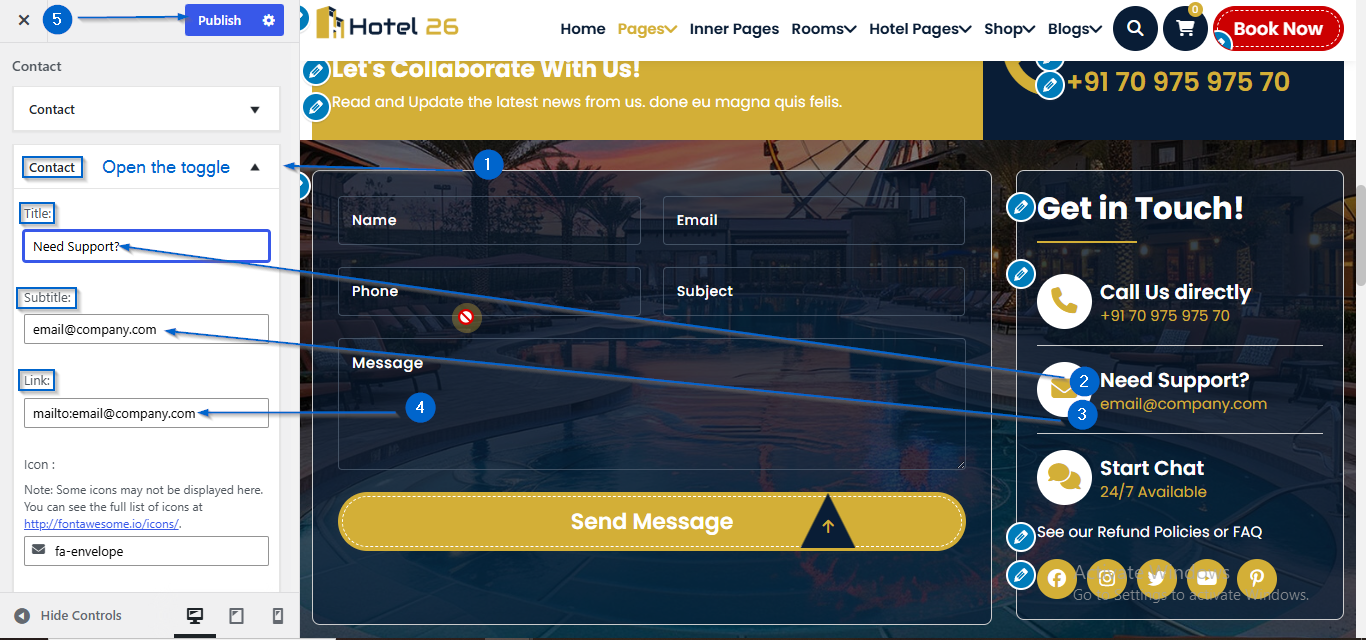
- Click to expand the Contact toggle
- Use the Title and Subtitle option to edit the content
- Enter the link in the Link: option
- Click Publish
- Go to Appearance > Customize
- Open Page Templates > Contact Form Section
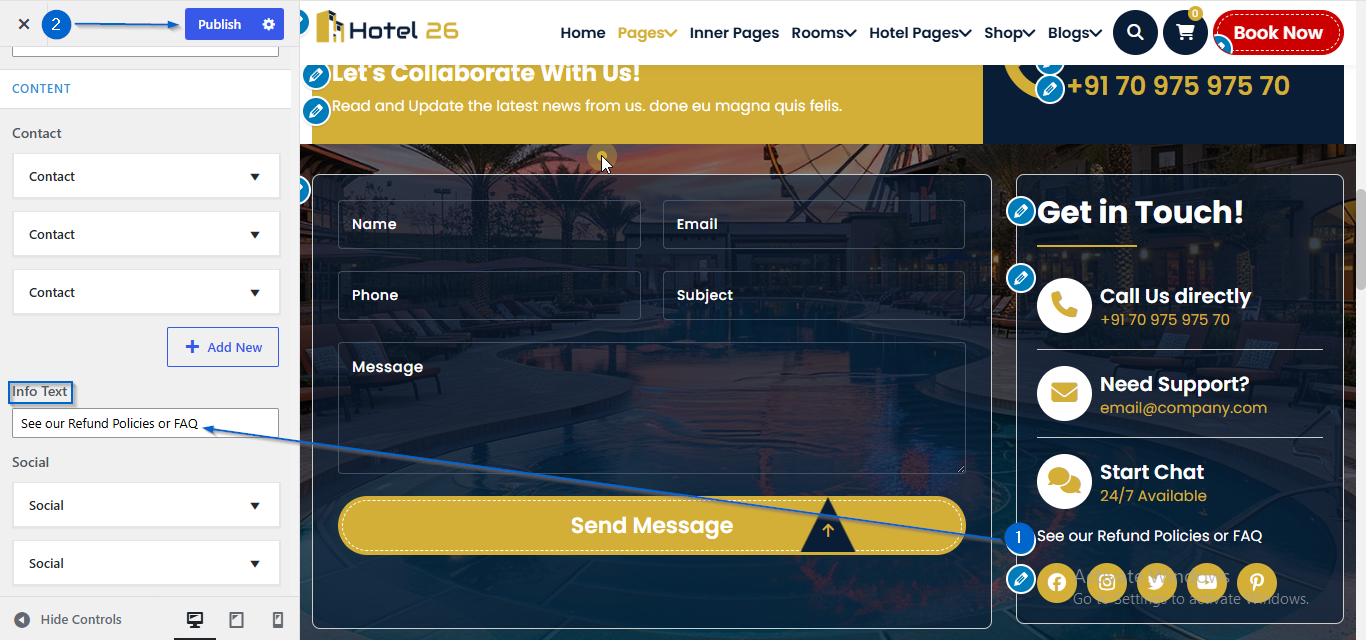
- Use the Info Text to edit the content
- Click Publish
- Go to Appearance > Customize
- Open Page Templates > Contact Form Section
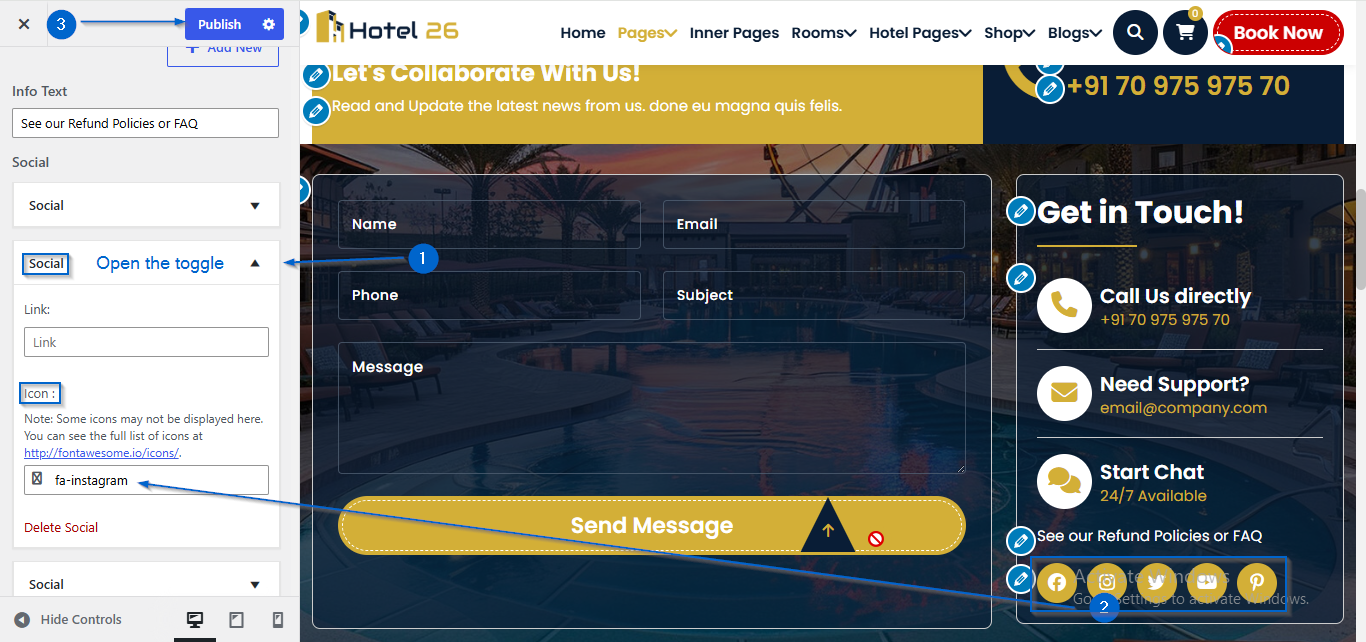
- Click to expand the Social toggle
- Use the Icon option to choose an icon
- Click Publish
- Go to Appearance > Customize
- Open Page Templates > Contact Form Section
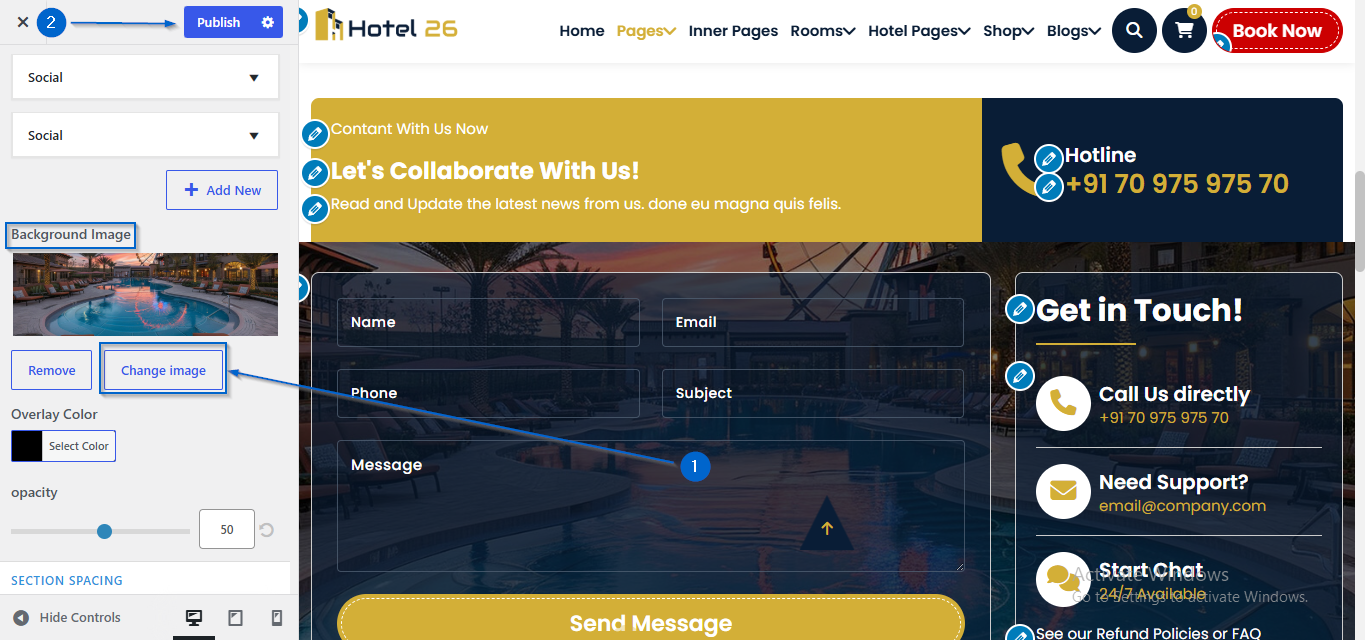
- Click Change Image under the Background Image option
- Select an image of your choice
- Click Publish
- Go to Appearance > Customize
- Open Page Templates > Contact Form Section
- Choose a color using the Overlay Color option
- Adjust the opacity using the Opacity option
- Click Publish