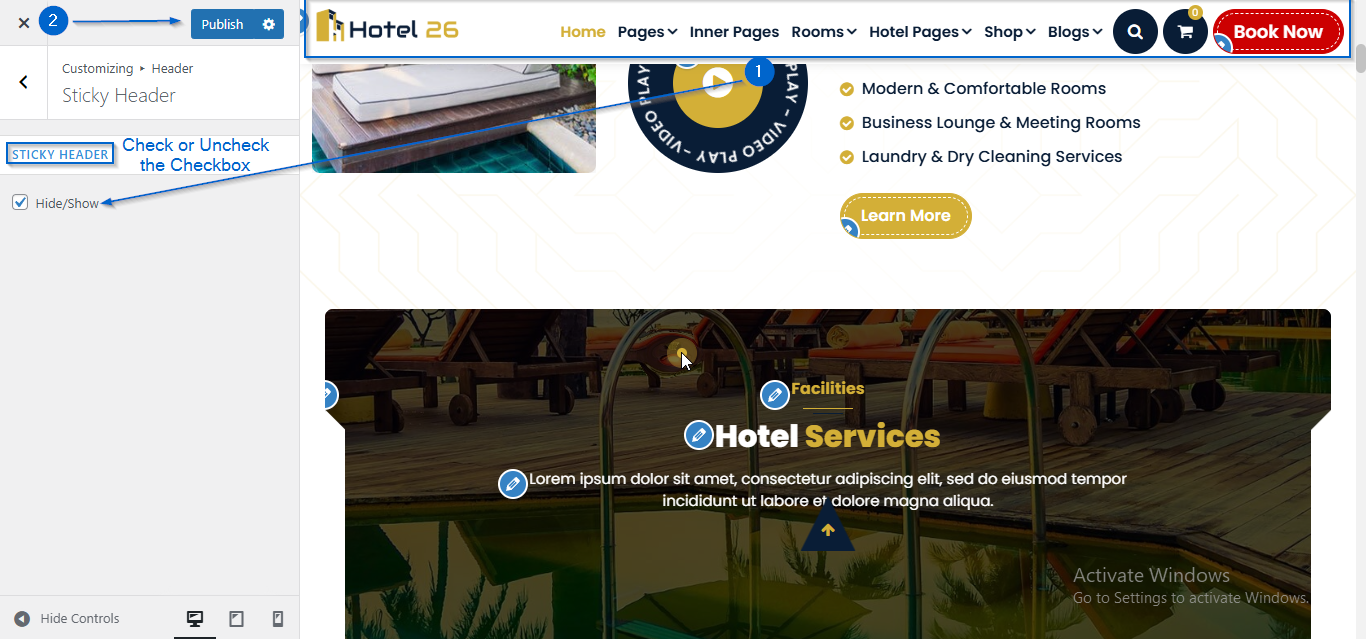
This section allows you to manage and customize the Header Section of your website.You can control the visibility, content, and layout using the available theme options.
Important :
- Make sure you are logged in to your WordPress Dashboard before following the steps below.
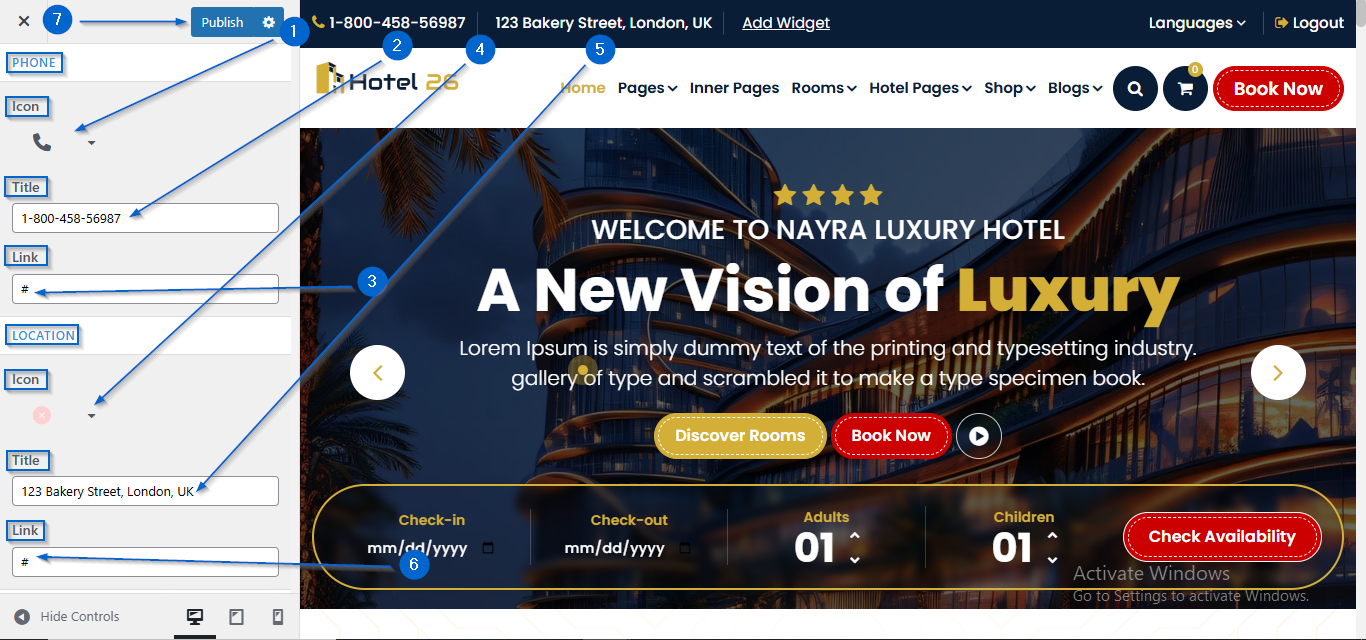
- Go to Appearance > Customize
- Open Header > Above Header
- Configure Phone and Location options:
• Icon
• Title
• Link - Click Publish
Before proceeding, make sure you have installed and activated the Polylang plugin. Once installed, configure the languages according to your requirements.
For more details, you can refer to the Polylang documentation. : Polylang Plugin
(a) Creating Language Menu
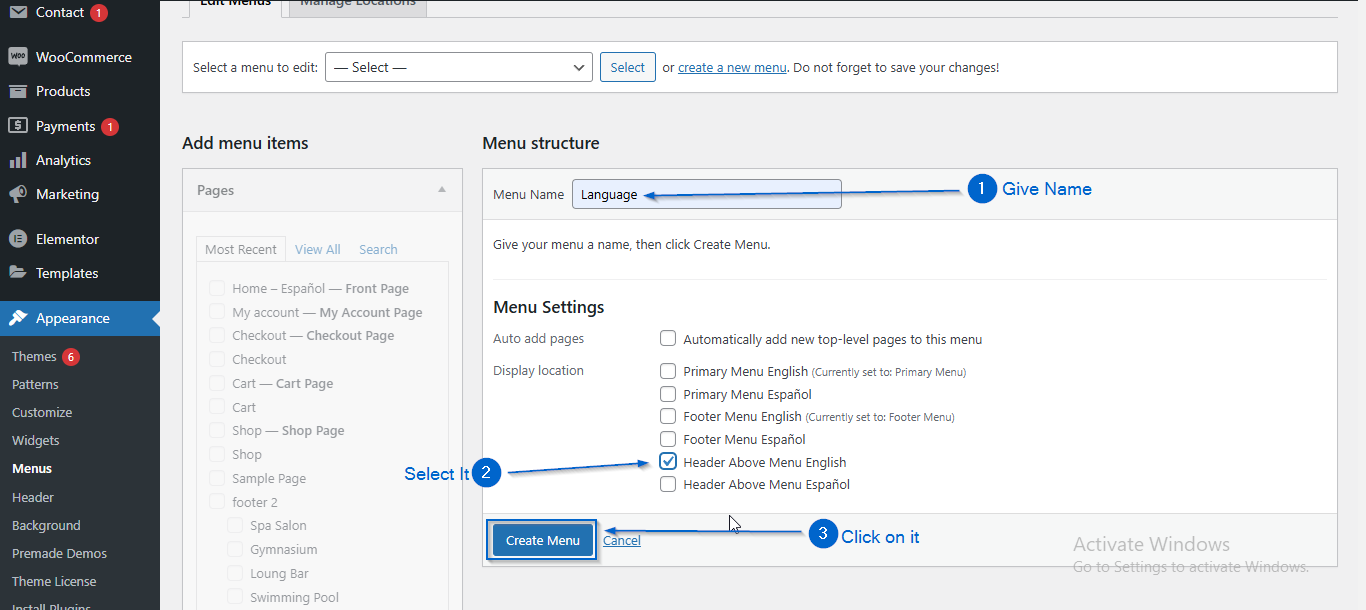
- Go to Appearance > Menus
- Click create a new Menu
- Enter a Menu name
- Select the Header Above Menu checkbox
- Click Create Menu
(b) Enable Language Switcher Option
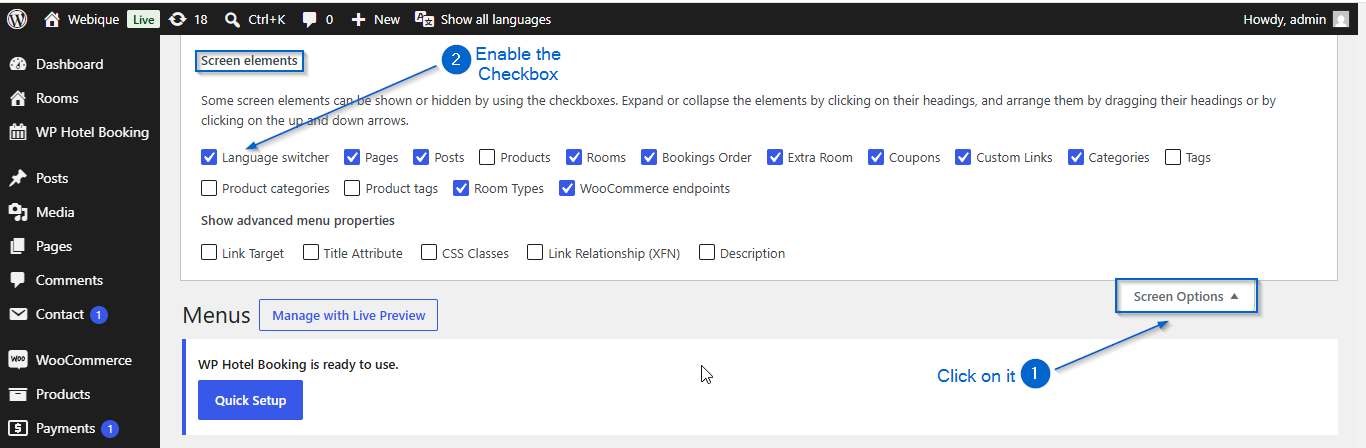
- Click Screen Options from the Top right corner of the Dashboard
- Enable Language Switcher
(c) Setting Up the Language Switcher
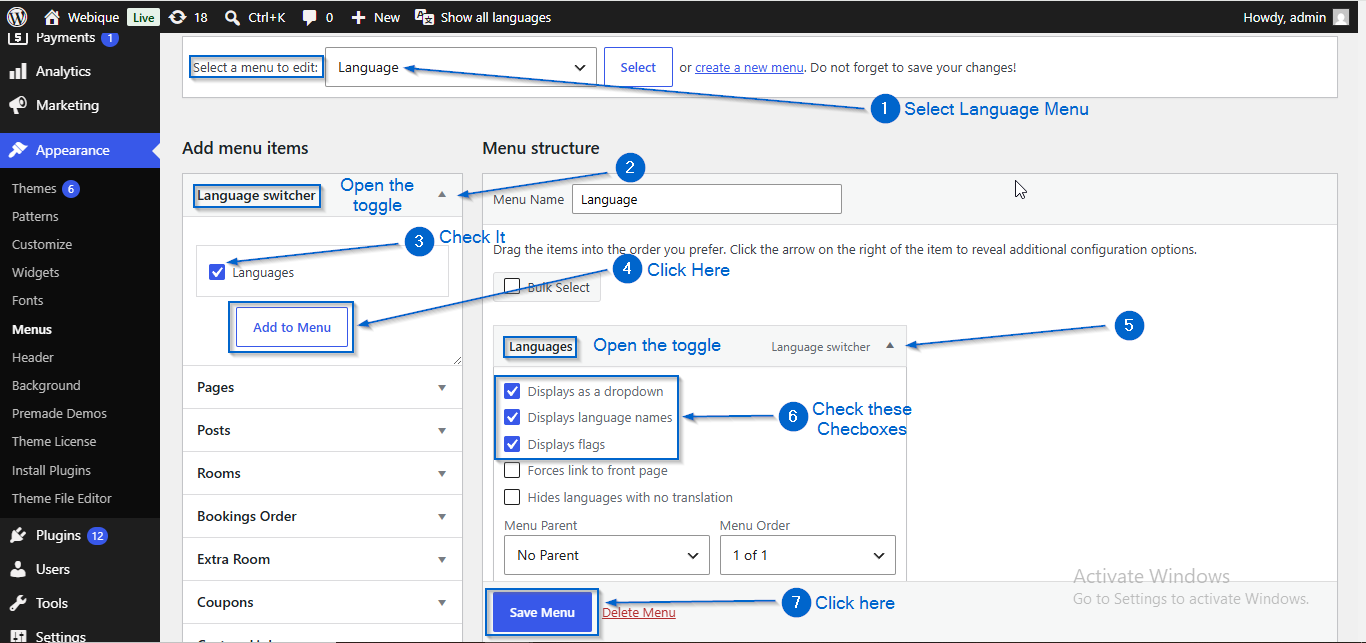
- Open the Menu you created in the previous steps
- Expand the Language switcher meta box
- Enable Languages checkbox
- Click Add to Menu
- Open Language Switcher settings
- Enable the following options:
• Display as a dropdown
• Display language names
• Display flags - Click Save Menu
(d) Adding Language Menu to Header
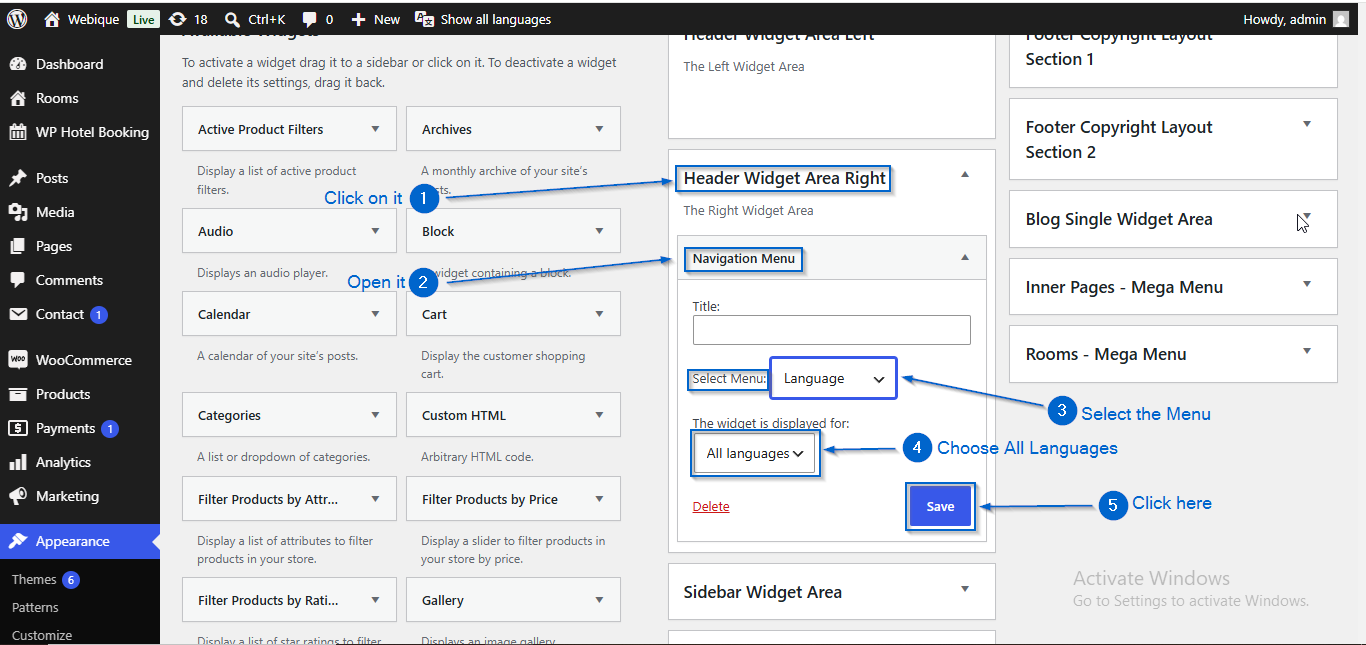
- Go to Appearance > Widgets
- Drag Navigation Menu from Available Widgets area to the Header Widget Area Right
- Open Navigation Menu settings
- Select the Menu you created previously from the Select Menu dropdown
- Choose All Languages
- Click Save
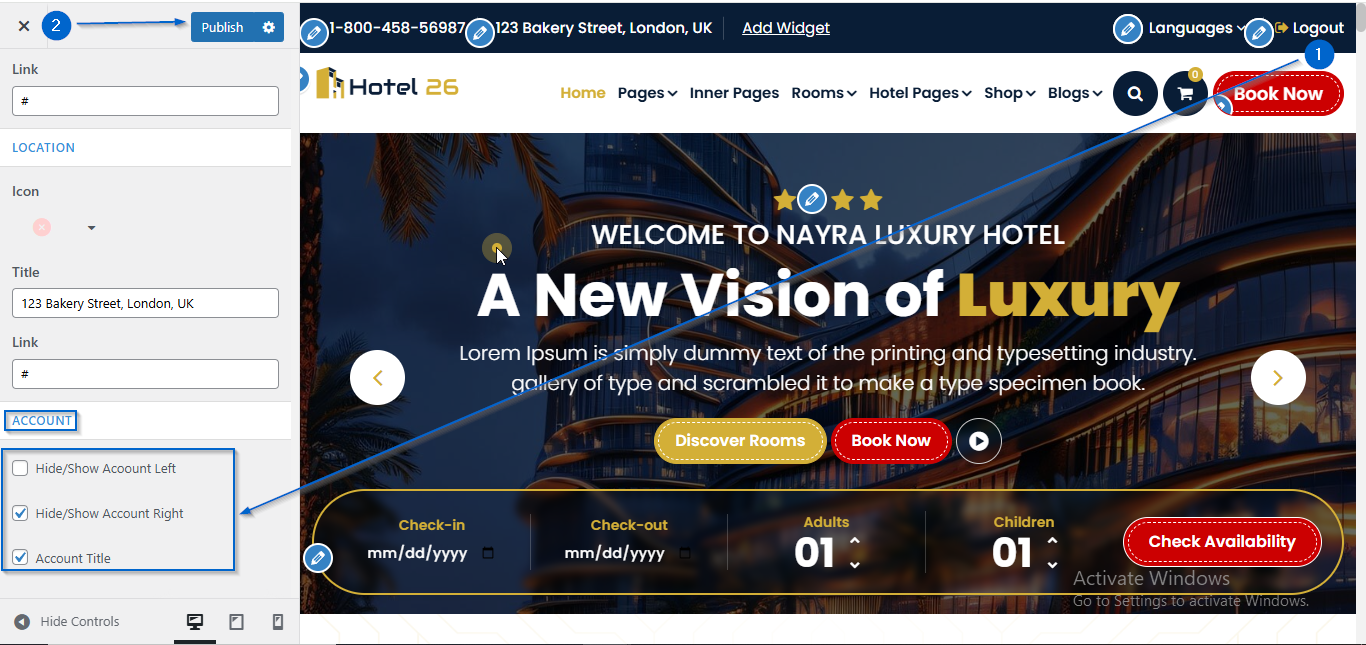
- Go to Appearance > Customize
- Open Header > Above Header
- Use the available checkboxes to configure the visibility
- Click Publish
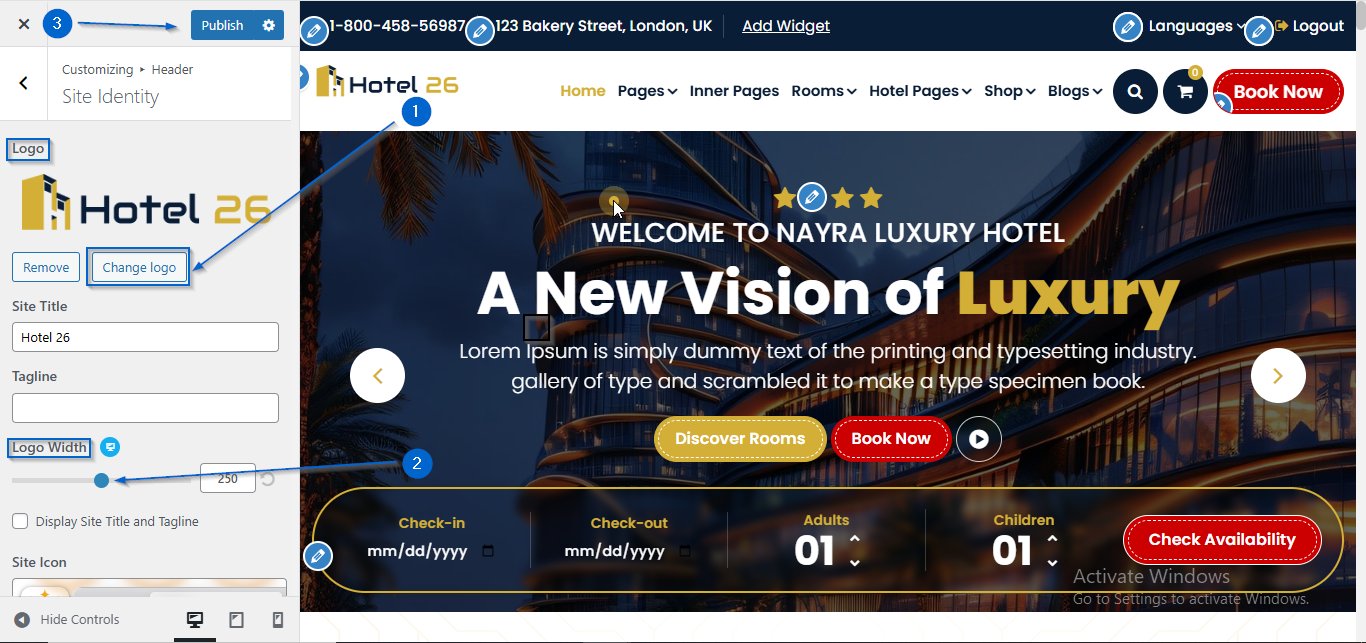
- Go to Appearance > Customize
- Open Header > Site Identity
- Click Change Logo under the Logo option
- Select a logo of your choice
- Adjust the width using the Logo Width option
- Click Publish
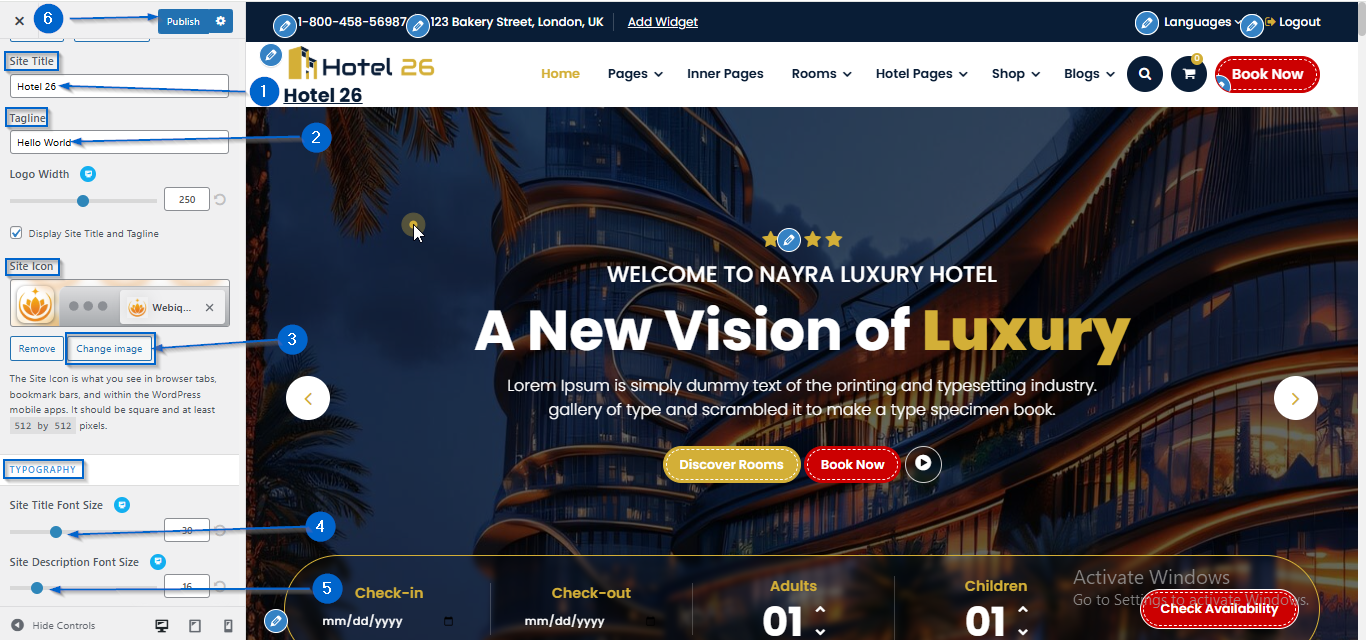
- Go to Appearance > Customize
- Open Header > Site Identity
- Use the Site Title , Tagline and Site Icon options to edit the content
- Click Publish when you’re done
Before you begin, decide which method you want to use. You can create menus from the WordPress Dashboard or the Customizer
: Dashboard Method :
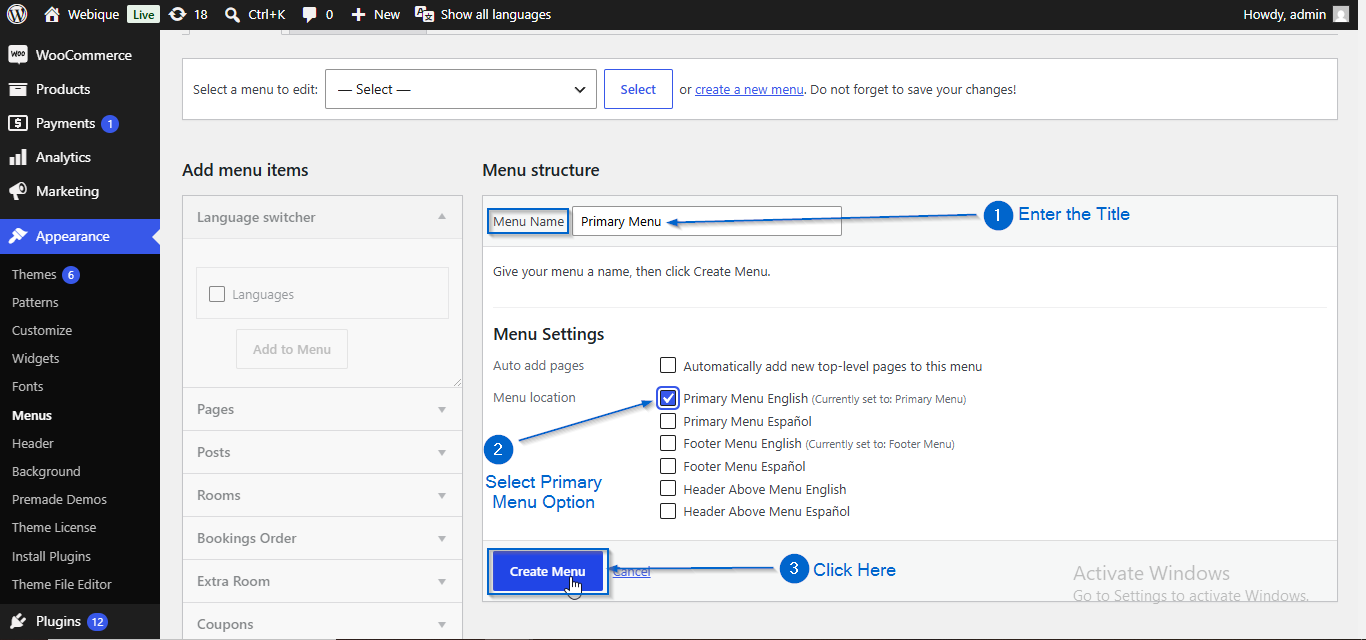
(a) Creating the Menu
- Go to Appearance > Menu
- Click Create a New Menu
- Enter a Menu name
- Select the Primary Menu checkbox
- Click Create Menu
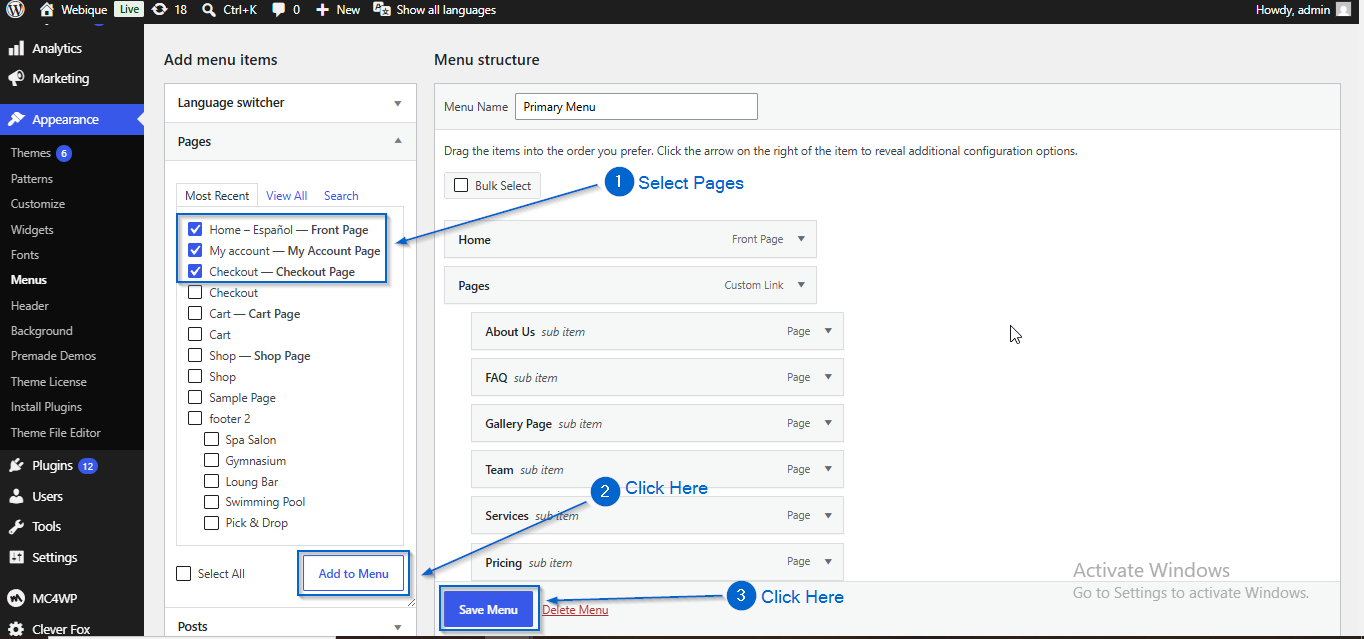
(b) Adding Pages to the Menu
- Select the Menu you created
- Choose the pages from the Add Menu Items section
- Click Add to Menu
- Click Save Menu
: Customizer Method :
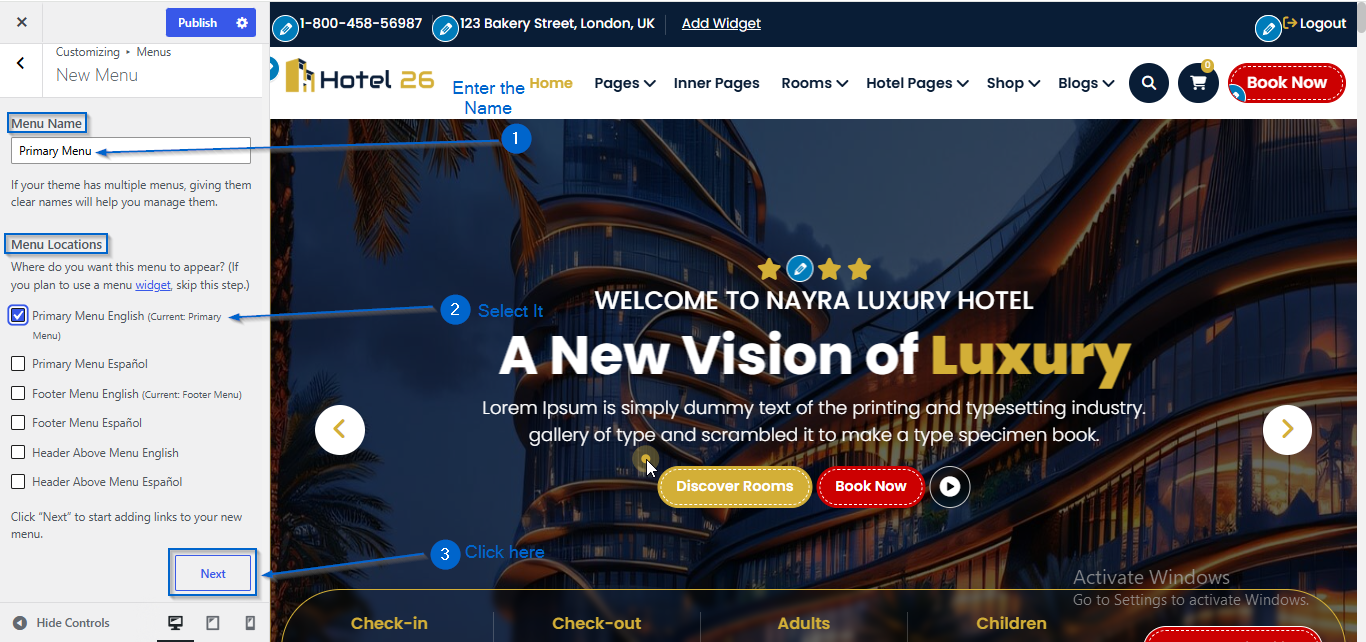
(a) Creating the Menu
- Go to Appearance > Customize
- Open Menus
- Click Create New Menu
- Enter a Menu name
- Select the Primary Menu checkbox
- Click Next
(b) Adding Pages to the Menu
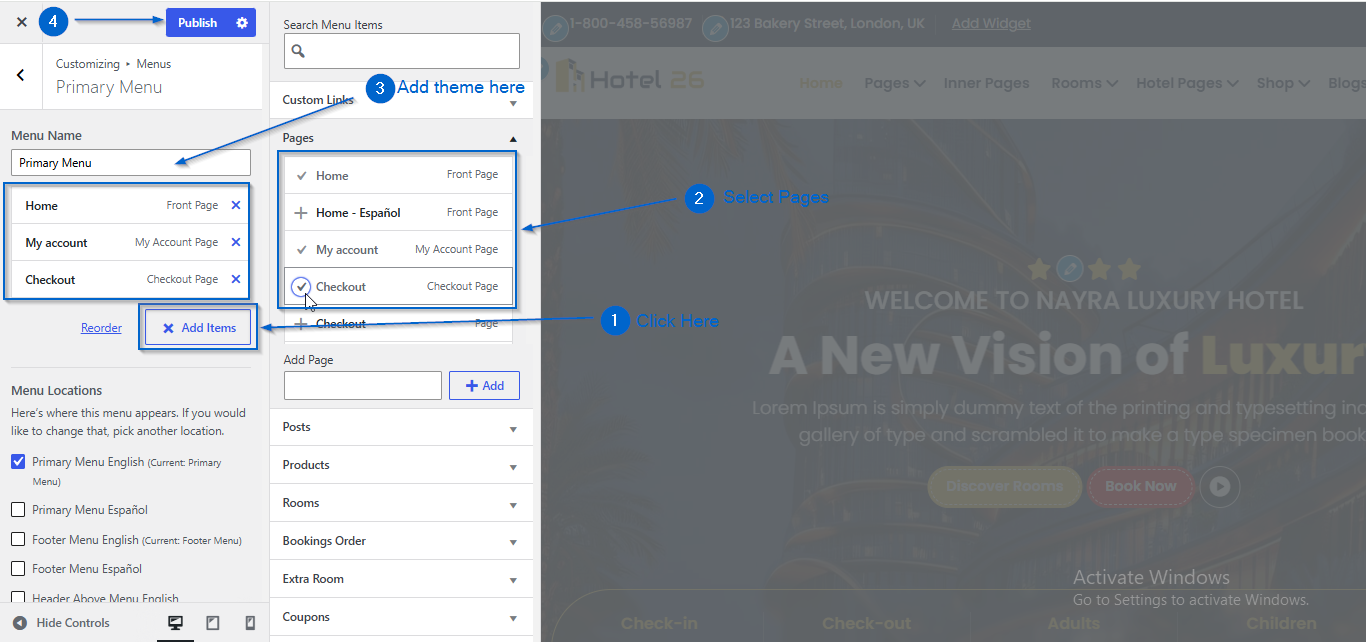
- Select the Menu you created
- Click Add Items
- Select the pages you want to add
- Click Publish
Before you begin, make sure you have already created a menu.
(a) Enable CSS Classes Option
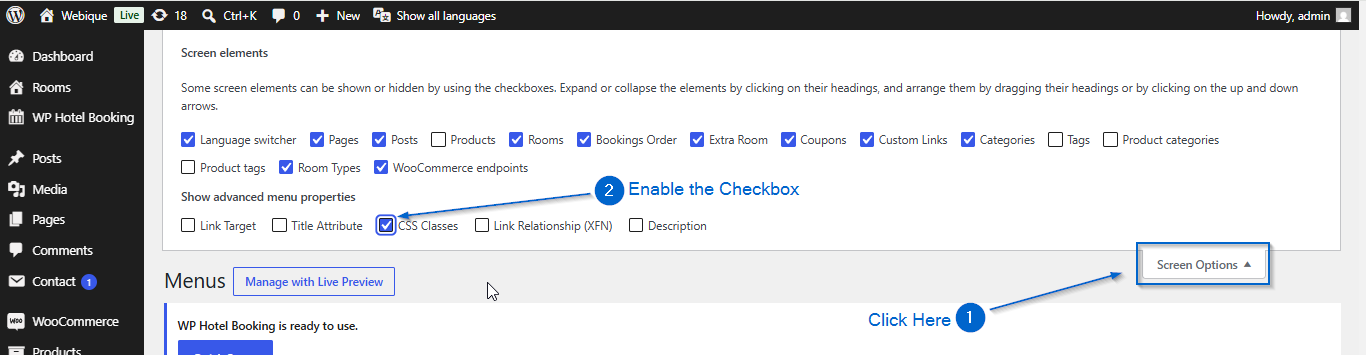
- Click Screen Options from the Top right corner of the Dashboard
- Enable CSS Classes
(b) Creating the Mega Menu Link
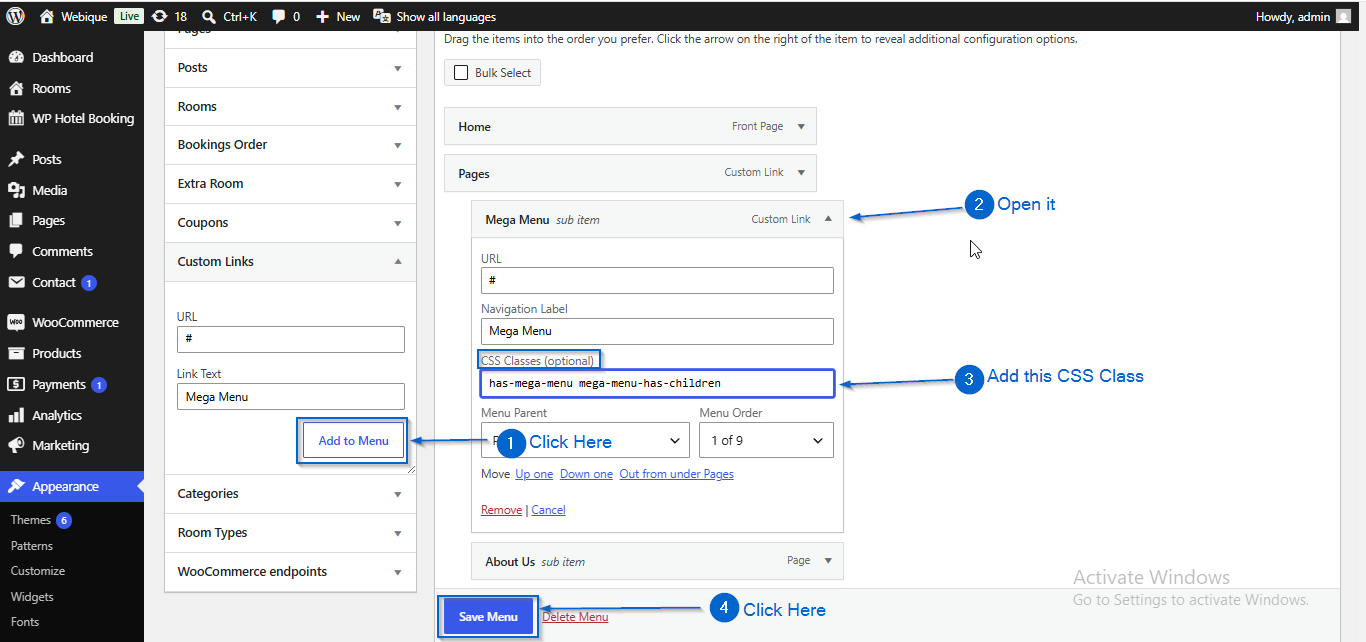
- Go to Appearance > Menu
- Select the Header Menu you created
- Add a Custom Link
- Enter a label of your choice
- Click Add to Menu
- Expand the Custom Link
- Enter
has-mega-menu mega-menu-has-childrenin the CSS Classes field - Click Save Menu
(c) Add Mega Menu Content
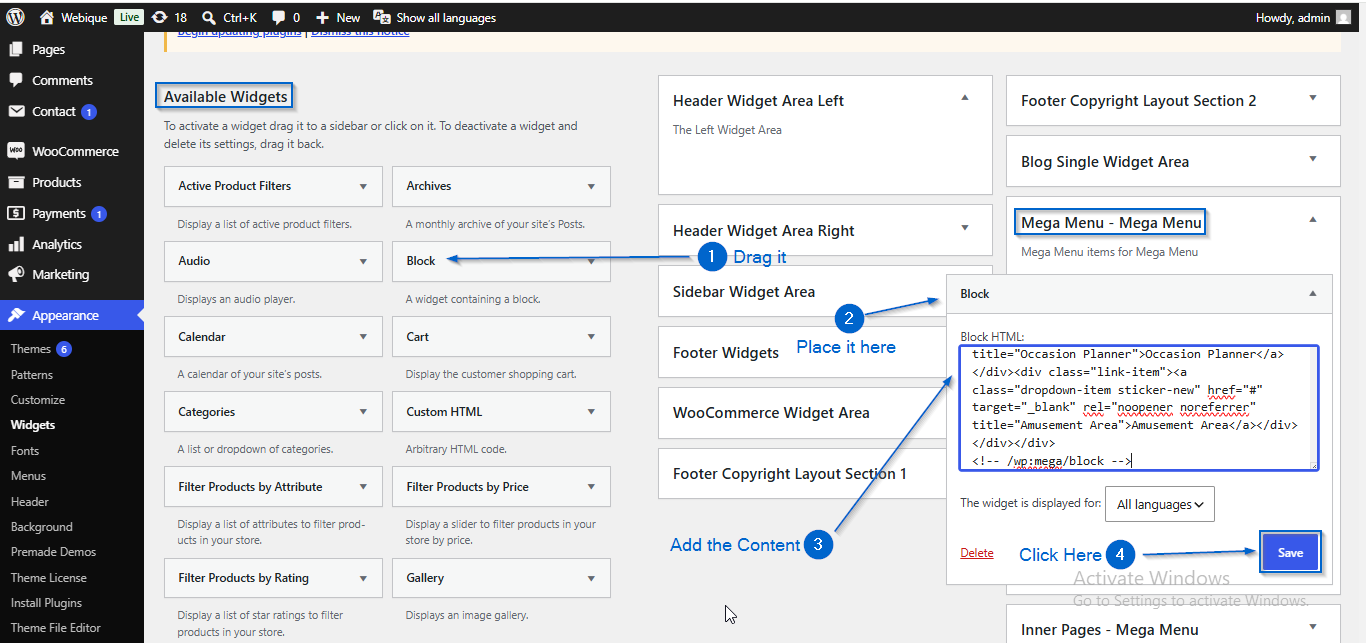
- Go to Appearance > Widgets
- Open the Mega Menu widget area
- Look for the (Menu Name) – Mega Menu widget area
- Drag the widgets you want to display into it
- Configure the widget content
- Click Save
Example: If your menu link is named Room, the widget area will appear as Room – Mega Menu
- Go to Appearance > Customize
- Open Header > Header Navigation
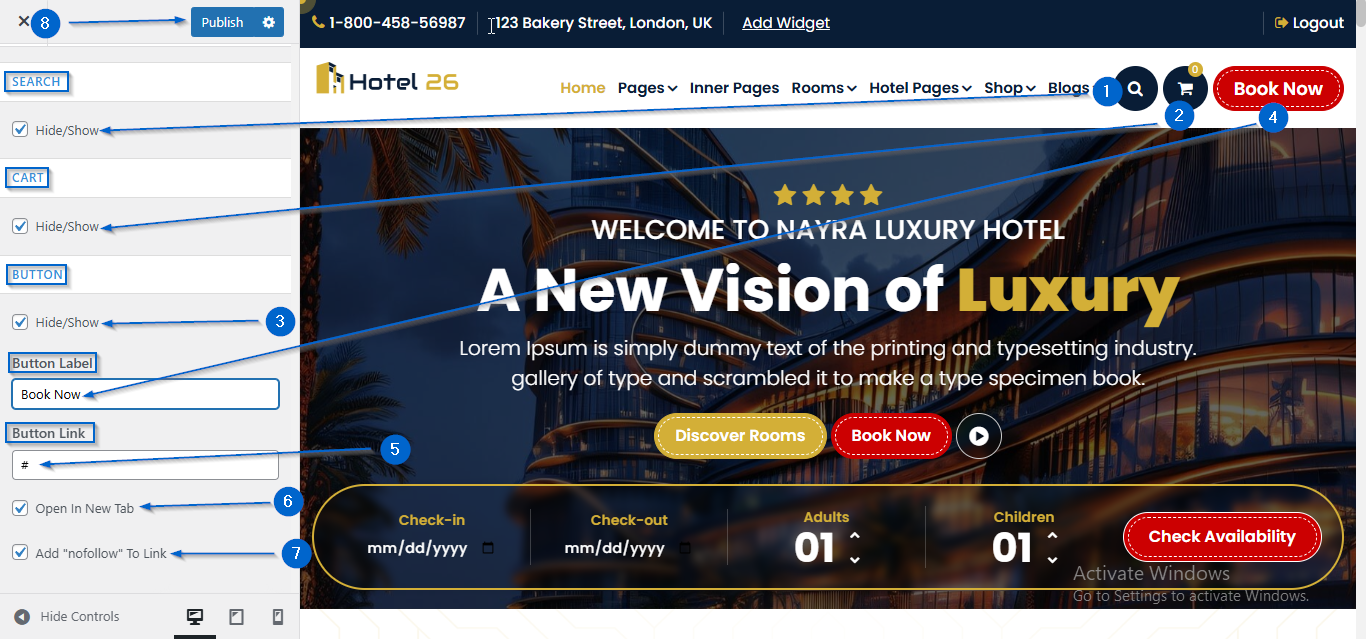
- Under the SEARCH and CART sections , Use the Hide/Show option to configure the visibility
- Enter the text in the Button Label option and the link in the Button Link option.
- You can also configure new tab and nofollow settings from the checkbox.
- Click Publish
- Go to Appearance > Customize
- Open Header > Sticky Header
- Use the Hide/Show option to configure the visibility
- Click Publish.