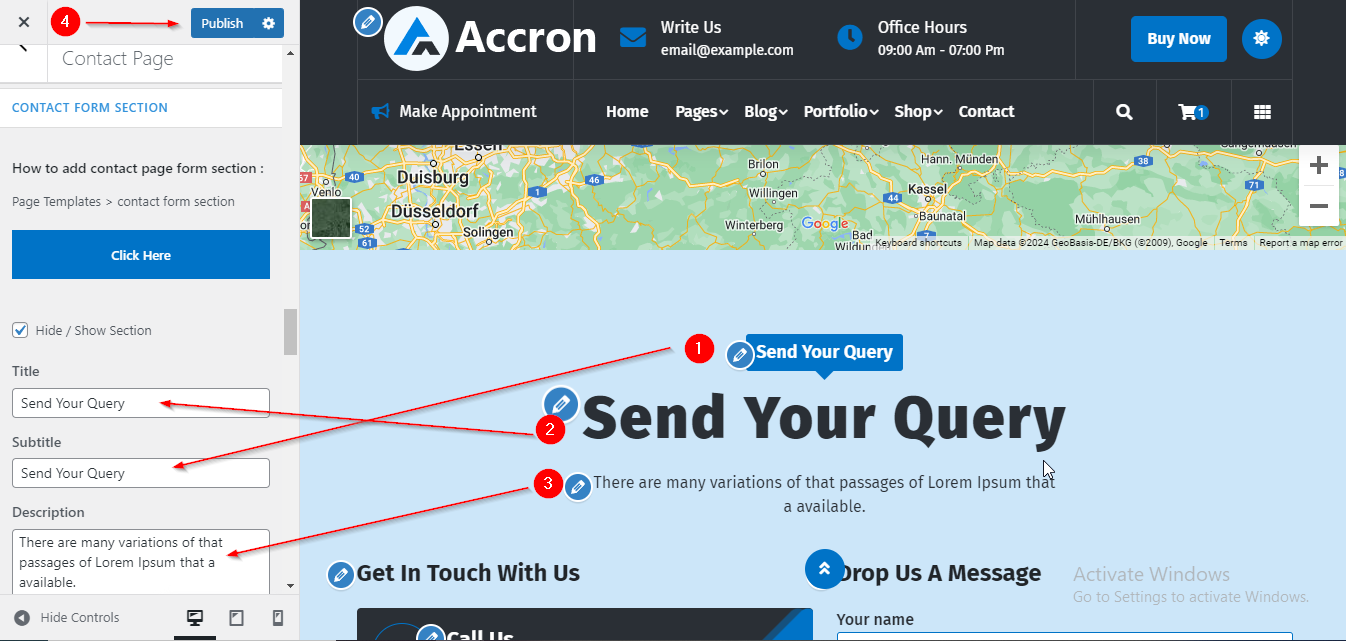
In WordPress Dashboard go to Appearance submenu and click on Customize.
After clicking on customize the theme Customizer page will appear .
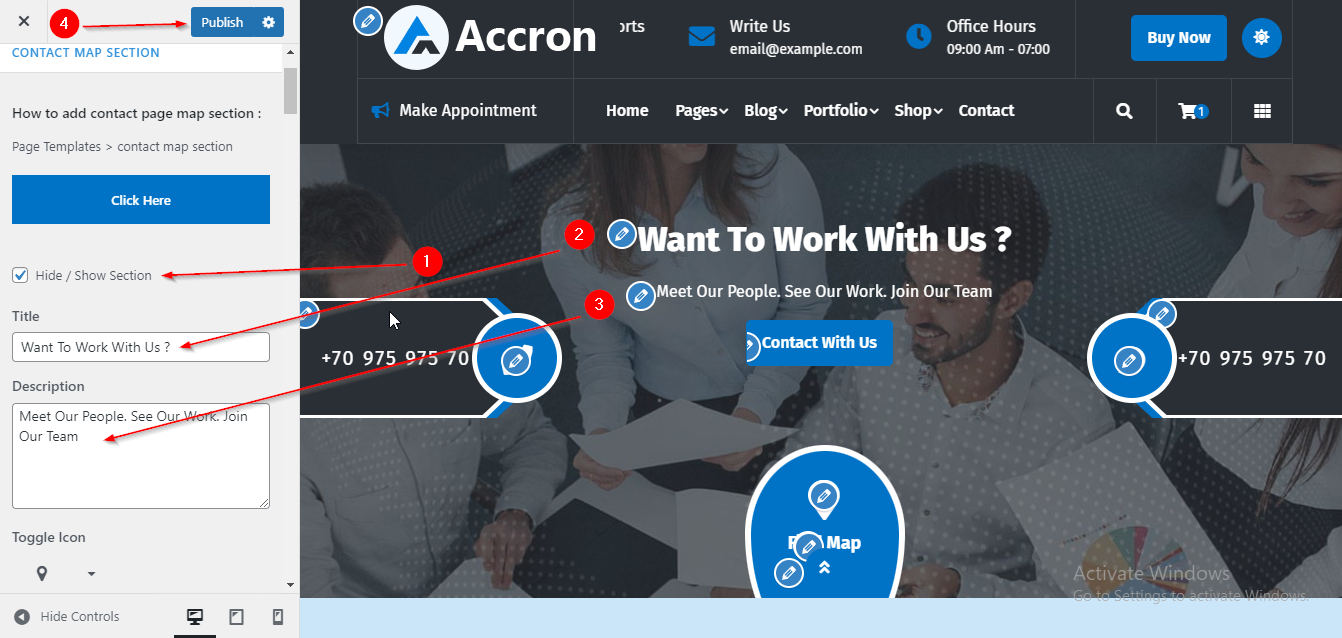
Here You have to follow this Path : Go to Customize -> Page Templates -> Contact Page
Now scroll down a bit till CONTACT MAP SECTION after reaching here you can Add Section Title , Subtitle & Description in Contact Map Section.
NOTE : Please First enable the Hide/Show Section to display Contact Map Section
Then click on Publish.
Please follow this Screenshot for Reference :
In WordPress Dashboard go to Appearance submenu and click on Customize.
After clicking on customize the theme Customizer page will appear .
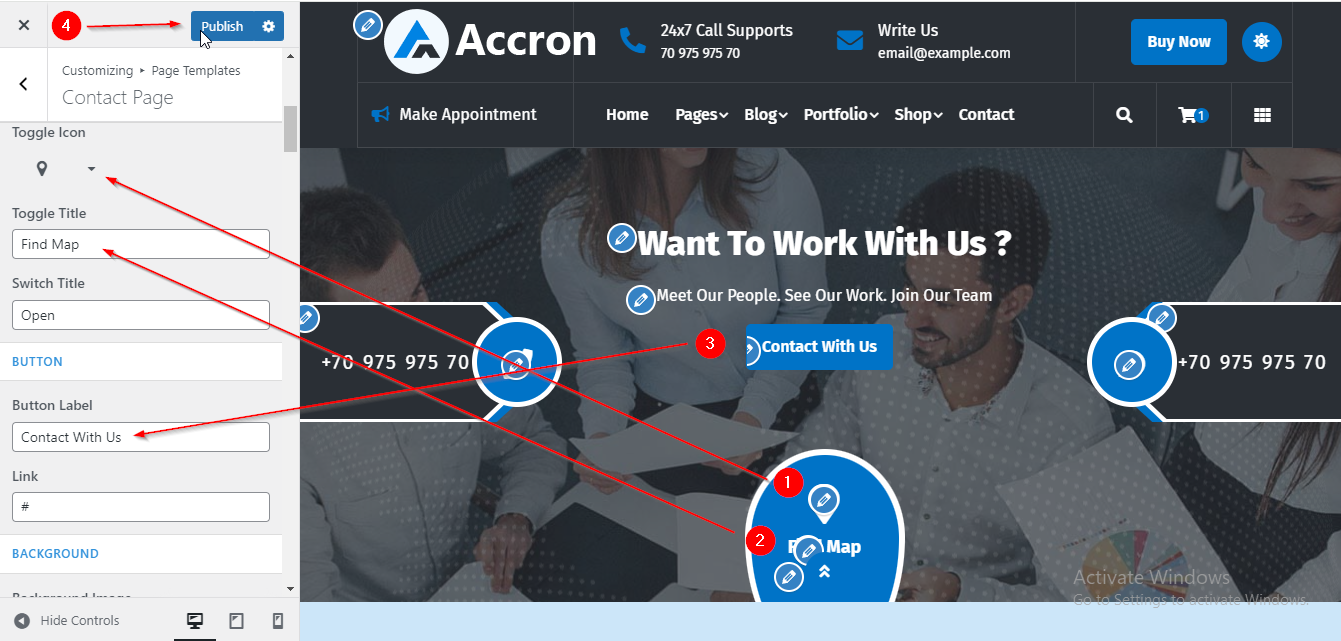
Here You have to follow this Path : Go to Customize -> Page Templates -> Contact Page
Now scroll down a bit till Toggle Icon after reaching here you can Add Content in Contact Map Section.
Then click on Publish.
Please follow this Screenshot for Reference :
In WordPress Dashboard go to Appearance submenu and click on Customize.
After clicking on customize the theme Customizer page will appear .
Here You have to follow this Path : Go to Customize -> Page Templates -> Contact Page
Now scroll down a bit till Background Image after reaching here you can Add Left Content, Right Content , Background Image and Adjust Image position in Contact Map Section.
Then click on Publish.
Please follow this Screenshot for Reference :
In WordPress Dashboard go to Appearance submenu and click on Customize.
After clicking on customize the theme Customizer page will appear .
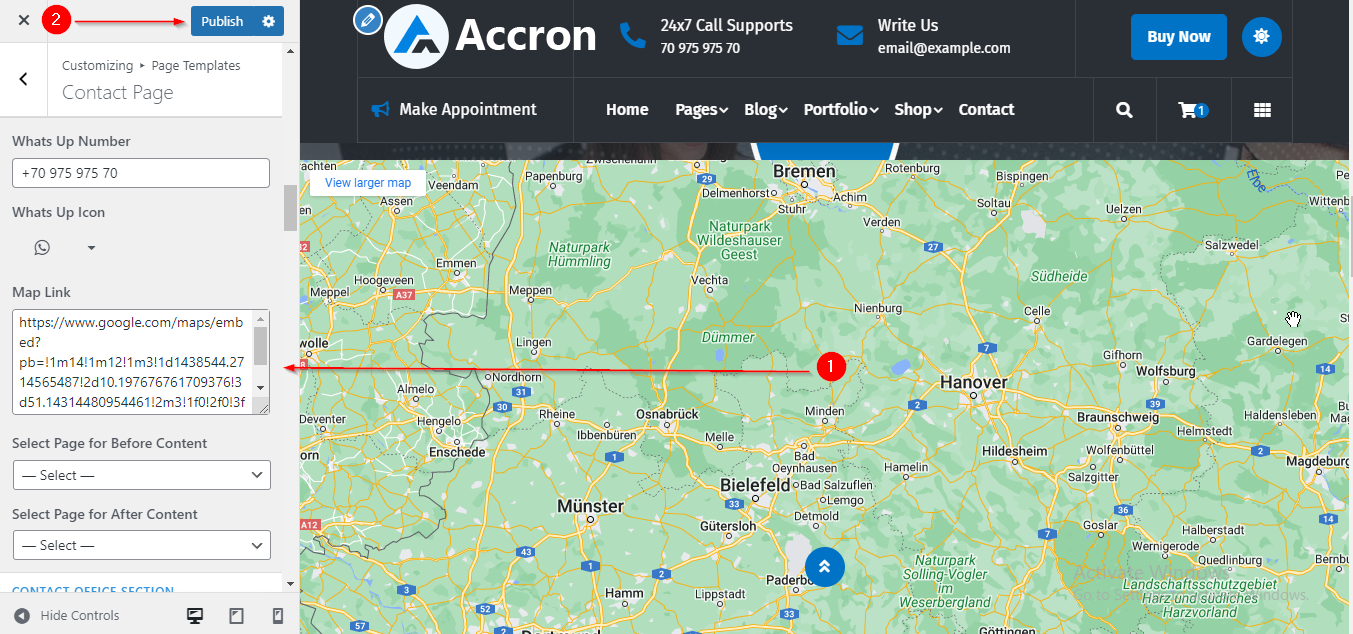
Here You have to follow this Path : Go to Customize -> Page Templates -> Contact Page
Now scroll down a bit till Map Link after reaching here you can Add Map Link in Contact Map Section.
Then click on Publish.
Please follow this Screenshot for Reference :
In WordPress Dashboard go to Appearance submenu and click on Customize.
After clicking on customize the theme Customizer page will appear .
Here You have to follow this Path : Go to Customize -> Page Templates -> Contact Page
Now scroll down a bit till CONTACT FORM SECTION after reaching here you can Add Map Link in Contact Map Section.
NOTE : Please First enable the Hide/Show Section to display Contact Form Section
Then click on Publish.
Please follow this Screenshot for Reference :
So here we have two different contents to manage in Contact Form Section. We will going to understand how to Manage these contents one by one in the following tutorial :
(A) How to Manage Left content in Contact Form Section
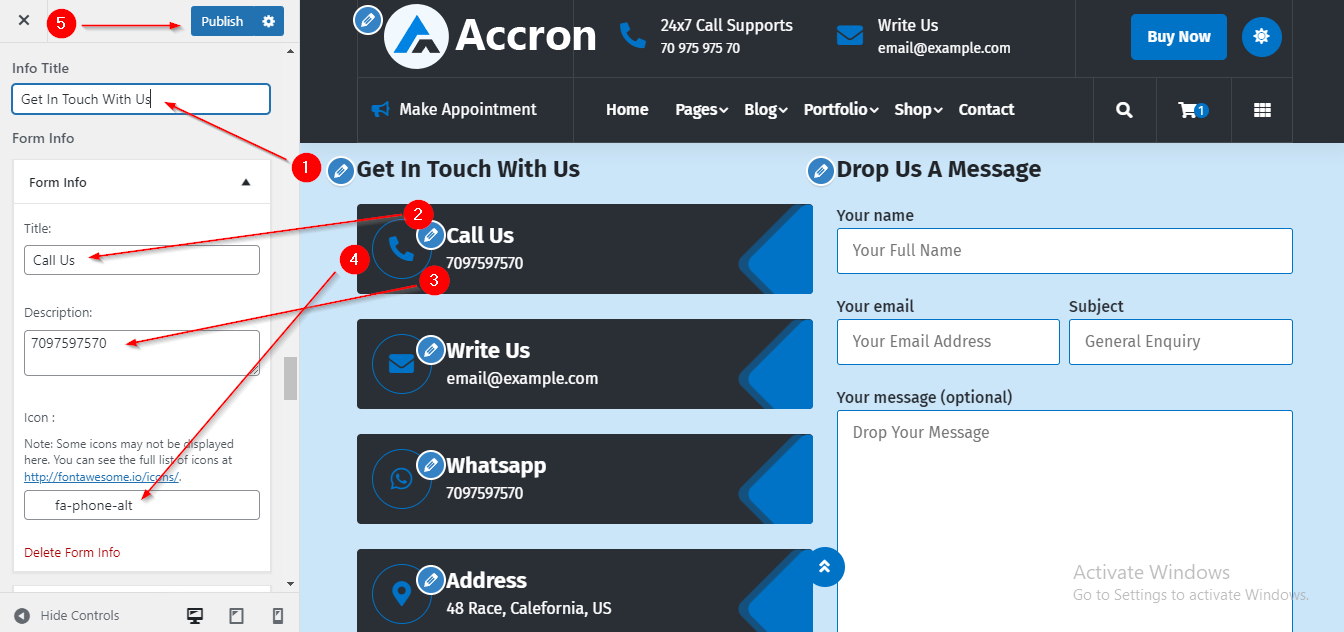
In WordPress Dashboard go to Appearance submenu and click on Customize.
After clicking on customize the theme Customizer page will appear .
Here You have to follow this Path : Go to Customize -> Page Templates -> Contact Page
Now scroll down a bit till Info Title after reaching here you can Add info title and Form Info in Contact Form Section.
Then click on Publish.
Please follow this Screenshot for Reference :
(B) How to Manage Right content in Contact Form Section
Before we add any Contact form in our demo through Customizer first we need to make a Contact Form in our Dashboard first. So now first let’s look at how can we make Contact Form in our Dashboard first in the Folowing Tutorial :
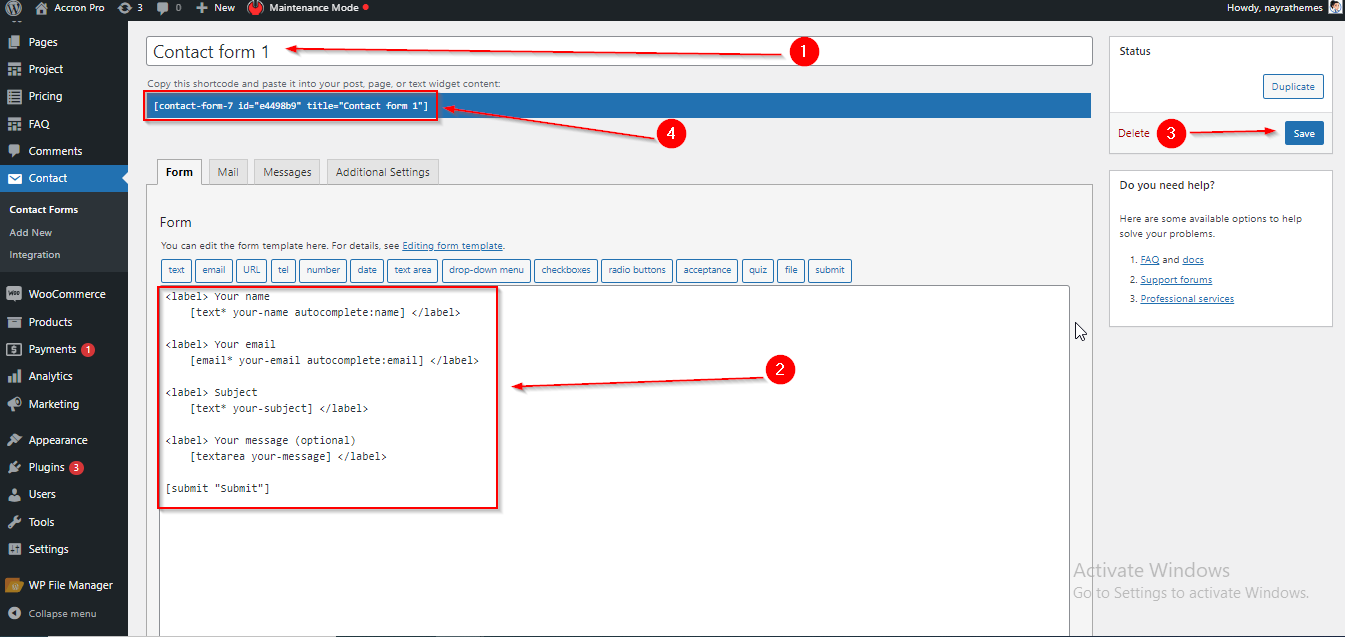
(1) Contact Form Making in Dashboard :
In WordPress Dashboard go to Contact Submenu and then click on Add New after clicking it you will reach to Edit Contact Form page . After reaching here you can make your Own Contact form and after making the Contact form you need to save it then it will generate a ShortCode so make sure to copy that ShortCode because you have to paste it in the Customizer to display your Contact Form in the Live Demo.
Please follow this Screenshot for Reference :
(2) Contact Form Adding in Customizer :
Now that we have understood how can we make Contact Form in our Dashboard we are going to display that Contact Form in our Demo. So now we will going to see how can we do that in the following Tutorial :
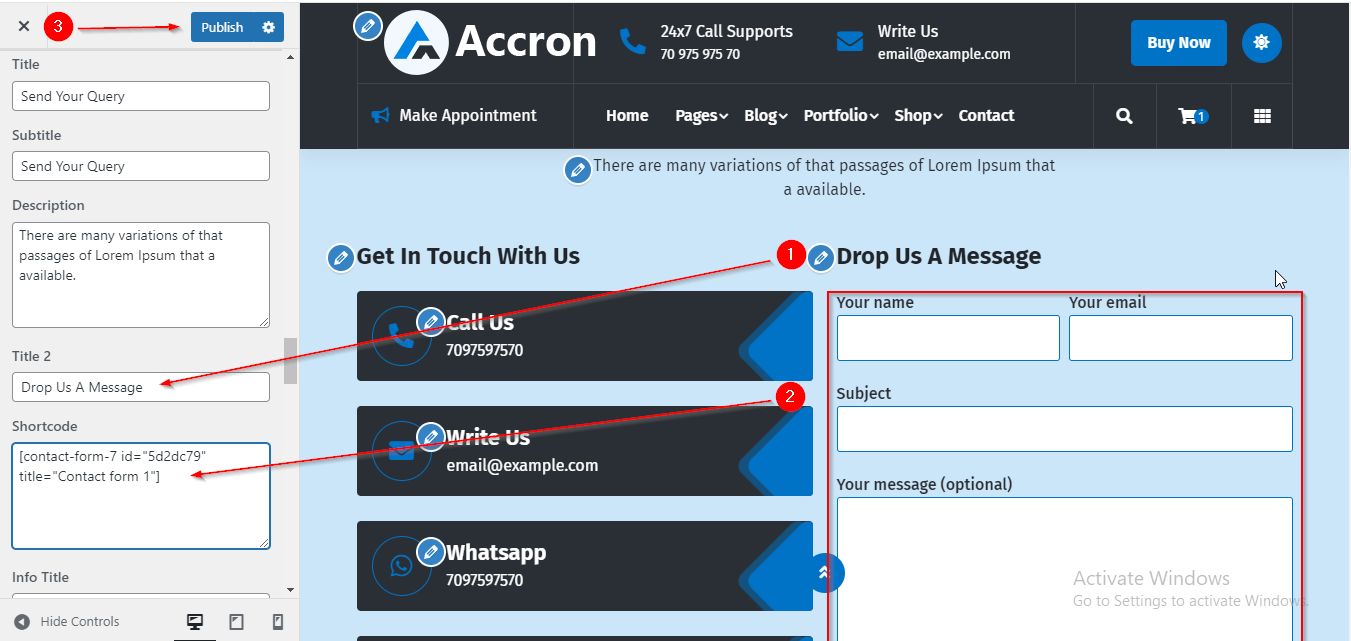
In WordPress Dashboard go to Appearance submenu and click on Customize.
After clicking on customize the theme Customizer page will appear .
Here You have to follow this Path : Go to Customize -> Page Templates -> Contact Page
Now scroll down a bit till Title 2 after reaching here you can Add Contact Form heading and paste the ShortCode which we copied earlier while making Contact Form in our Dashboard in Shortcode field in the Contact Form Section.
Then click on Publish.
Please follow this Screenshot for Reference :
In WordPress Dashboard go to Appearance submenu and click on Customize.
After clicking on customize the theme Customizer page will appear .
Here You have to follow this Path : Go to Customize -> Page Templates -> Contact Page
Now scroll down a bit till CONTACT SOCIAL INFO SECTION after reaching here you can Add Background Image in Contact Social Info Section.
NOTE : Please First enable the Hide/Show Section to display Contact Social Info Section
Then click on Publish.
Please follow this Screenshot for Reference :
![]()
In Contact Social Info Section we have two different contents i.e Left and Right content. So we will now going to understand how to manage them one by one.
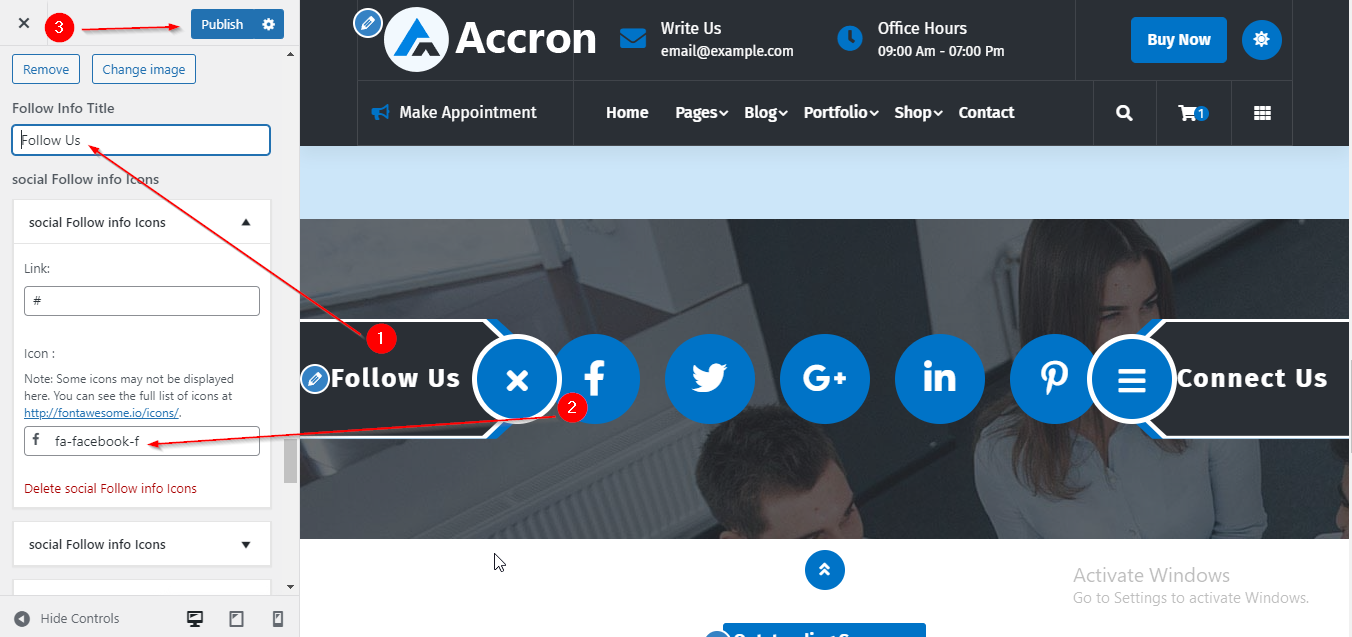
(A) How to Manage Left Content in Contact Social Info Section :
In WordPress Dashboard go to Appearance submenu and click on Customize.
After clicking on customize the theme Customizer page will appear .
Here You have to follow this Path : Go to Customize -> Page Templates -> Contact Page
Now scroll down a bit till after reaching here you can Add title in left content in Contact Social Info Section then open the toggle social Follow info Icons here you can add icons in left content in Contact Social Info Section.
Then click on Publish.
Please follow this Screenshot for Reference :
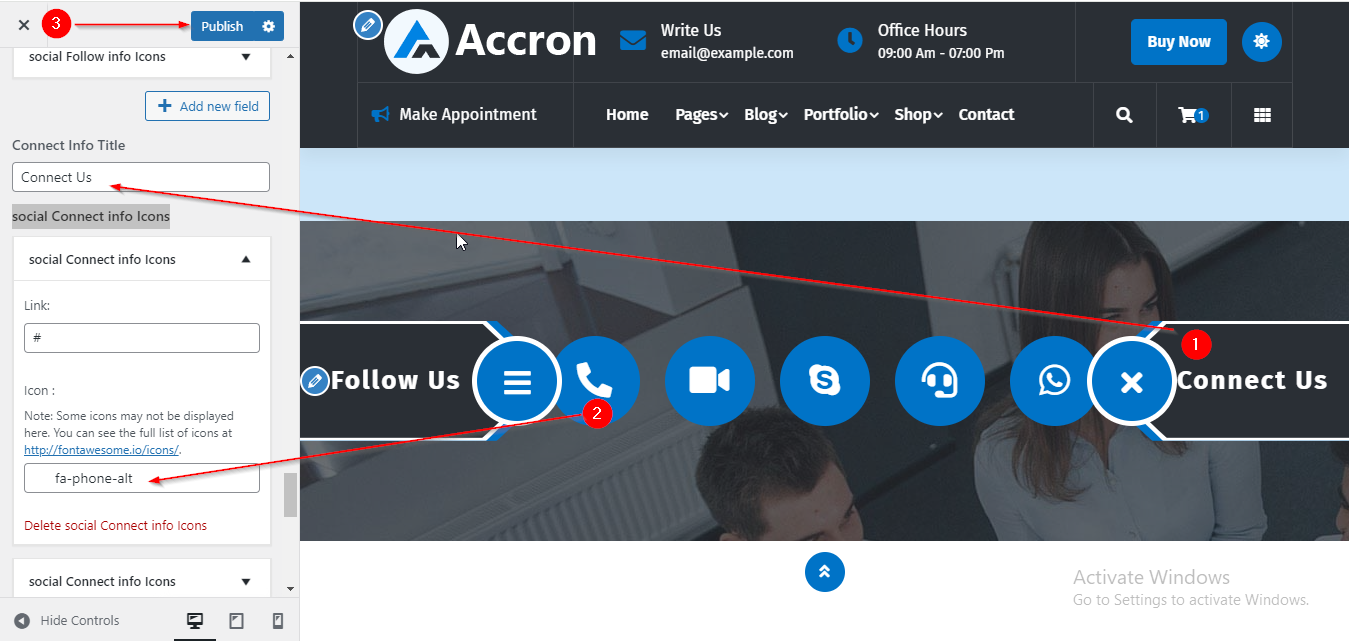
(B) How to Manage Right Content in Contact Social Info Section :
In WordPress Dashboard go to Appearance submenu and click on Customize.
After clicking on customize the theme Customizer page will appear .
Here You have to follow this Path : Go to Customize -> Page Templates -> Contact Page
Now scroll down a bit till Connect Info Title after reaching here you can Add title in right content in Contact Social Info Section then open the toggle social Connect info Icons here you can add icons in right content in Contact Social Info Section.
Then click on Publish.
Please follow this Screenshot for Reference :